Collet Chuck For The WM250 Lathe
As with most cheap 3-jaw chucks the one supplied with the lathe is only accurate to about 0.1mm (0.004"). So for smaller work I decided to get a collet chuck. The choice was fairly straightforward as I already had a set of ER25 collets for the milling machine. I purchased a suitable chuck from Warco together with the necessary backplate and set to fixing it to the lathe.
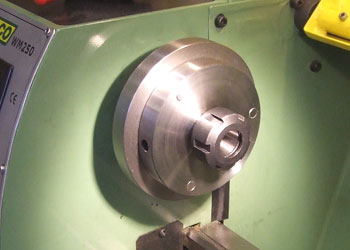
Unfortunately the chuck is not "ready to go" and the backplate needs machining to enable the chuck to mount on the lathe spindle. The first job is to mount the backplate onto the spindle. The backplate is supplied bored through to fit the spindle nose and is held in place as the other chucks by three studs and nuts. I replaced the standard nut and washer arrangement with smooth faced flanged nuts.
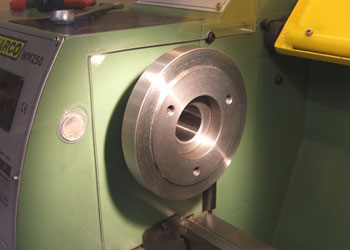
Once in place the backplate, which is cast iron, can be machined to fit the recess in the collet chuck (1). I first took a skim off the face to make certain it was flat and then carefully reduced the diameter until it was a good fit into the chuck recess. I used a sharp knife tool to undercut the internal corner to ensure that the chuck would bolt up tight to the face. I could of reduced the diameter of the backplate to match the chuck but decided to just take a couple of cuts to clean it up and make sure it was running true. Before I removed the backplate I marked it to line up with the stamped 0 on the lathe spindle flange and once removed stamped it so that it would go back in the same orientation.
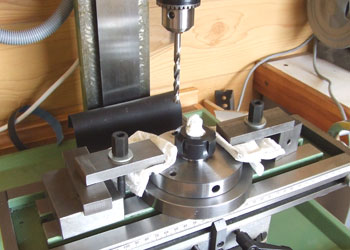
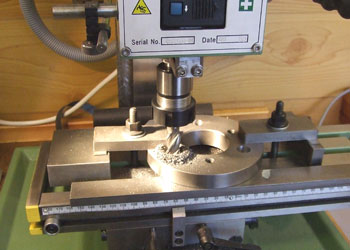
The next stage is to mark the mounting holes. There are probably better ways of doing this but I opted to use the chuck to set out the holes. I mounted the chuck and backplate onto the milling machine table (2) and more by luck than judgment the holes lined up with the t-slots in the table so I didn′t need to use packing. I carefully lined up a 6mm drill to go through the threaded hole in the chuck without touching the threads and drilled through. The paper towel is to stop swarf getting into the collet hole and to protect the surface.
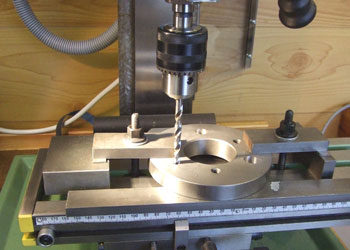
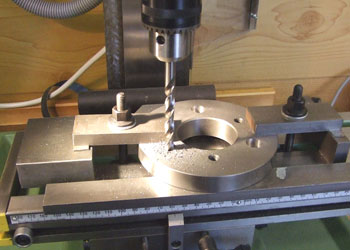
With the three mounting holes drilled through I put the chuck to one side and re-fixed the backplate to the milling machine table the other way up (mounting boss down). This time I needed some packing as the bigger drill would not clear the table. Once clamped down I machined each mounting hole in turn. First using the 6mm drill to line up with the existing hole (3). Then drilling through 8mm for the mounting bolts (4). Finally using a milling cutter to counterbore a suitable recess for the 8mm allen headed bolt (5).
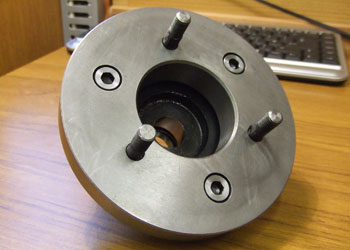
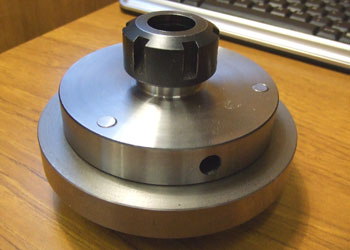
Once bolted up the new chuck was fitted to the lathe (6) and tested. With a length of 10mm silver steel in the collet there was no discernible runout. Photos (7) and (8) show two views of the chuck. You can see that I had to machine the heads of the allen bolts to ensure they were below the surface of the backplate. Once in place I also carefully machined down the ends of the bolts level with the chuck surface.