3D Printing in Lockdown

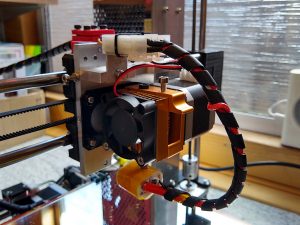
Like many this year I have been “mainly staying at home”. As you can tell from the sparsity of posts I have not been doing very much either, a bit of exercise on the bike a couple of times a week, pottering in the garden and tinkering in the workshop. The workshop tinkering was partly targetted at rejuvenating my old 3D printer which has not seen much use recently partly down to a loose print-head. I resolved to fix this by making a new aluminium backplate to get rid of the plastic frame that held the print-head in place. Whilst the printer was in bits I also decided to fit cable chains and “improve” the wiring to make the hot end easier to maintain. The outcome was only partially successful.
Print-Head Mods
Print-Head Mods

The aluminium backplate worked and held the print-head to the X-carriage securely making use of a ready made steel angle bracket from another make of printer. The wiring mod worked by inserting Molex connectors between the hot-end and the main wiring loom from the print-head assembly. Cable chains were a failure the cables not being heavy enough or flexible enough to make them work as intended.

One of the unforeseen problems was that having removed the build plate fans, printing anything small or with small details wouldn’t work. I was going to print new housings for the fans to screw to the sides of the new backplate this proved to be difficult. I am sure I would have got there eventually but being somewhat impatient I opted for a different solution. Buy a new printer!

A New 3D Printer
Prusa i3 Mk3S Printer
Prusa i3 Mk3S

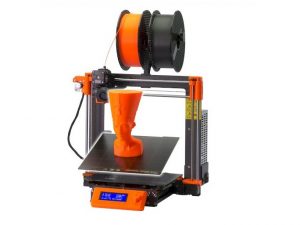
I spent some time researching which printer to buy, not an easy choice. You can pretty much pay anywhere between a couple of hundred to a few thousand pounds for a smallish 3D printer but within my price bracket the Prusa i3 Mk3S consistently had good reviews and I opted for this rather than one of the many short lived strangely named Chinese offerings. At first glance the new printer looks very similar to the old but there are many differences and improvements from old to new.

I opted for the kit version of the printer, it is quite a bit cheaper than the fully assembled one and the kit gives you plenty of insight into how the printer works for future maintenance jobs. I was going to do a write up of the build but there are so many versions on-line including some excellent videos that I decided against it. Not only that, the build manual is so good it really doesn’t need any help. Assembly is quite straightforward just read the manual carefully, and eat the Gummy Bears (Gummibär) as directed. The most difficult part is putting the print head assembly together. The printed parts are made in Prusa’s 500+ printer farm, which uses the same model printer, from PETG. The finish and accuracy of these parts is very good and the files to print replacements are all included on the SD card. The supplied hardware is also of good quality including, at least on mine, Misumi linear bearings. Interestingly as I was writing this Prusa announced an upgrade to the printer, the latest version is now the i3 Mk3S+. Also available (January 2021) is an upgrade to v2.3 of the PrusaSlicer software which makes a few useful changes

Continue reading “3D Printing in Lockdown”
Starting Out – Home Workshop

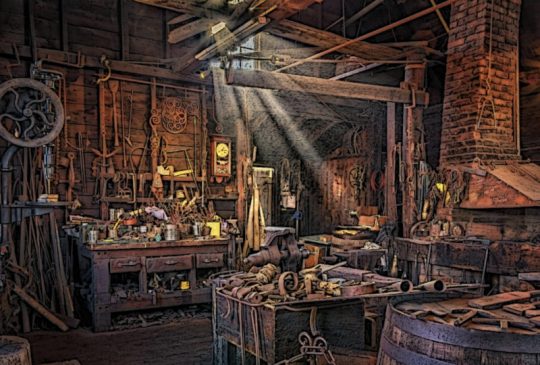
Well at long last I have added some new pages to help anyone who is thinking about starting a “Home Workshop”. Nothing too detailed but there are plenty of pictures and loads of links, a few hints and tips and a couple of ideas to start you in the right direction.

Blacksmith's workshop
Old Blacksmith’s Shop
There are five new pages in all covering:

Good luck with the new workshop and the many successful projects that will emanate from it.

Long Time No See

Well this is the first post in over a year just to let you know that I haven’t gone away. Life has conspired to prevent any modelling activity since the autumn of 2017. I have not been to a show or exhibition since Spalding in April 2017 and it seems unlikely that I will be able to get to any of the shows this year. I was looking forward to Bristol and the Midlands show but maybe I will get to go next year!

I have not even been able to get into the workshop very often and then only to power up the lathe and mill for a short run to keep the oil and bearings in working order. Apparently lathe bearings can distort if not used for long periods of time going slightly oval with the weight of the spindle. The only useful thing I have managed is to make some shelf space by recycling a load of old magazines, mainly MEW which if I need I can see on-line.

I did manage to do a bit of work on my 3D printer in between my “carer” duties though. I have been trying to improve the print head mounting and to install a cable chain. Neither project went very well and I now have a printer that is back in kit form having not been able to finish the work! Oh well, another project for next year. I have also been trying to write another couple of pages for the site but it is very slow going as I can’t spend too long in one session and I lose the thread, some might say I have lost the plot but I lost that years ago…

DTI Magnetic Base Stand

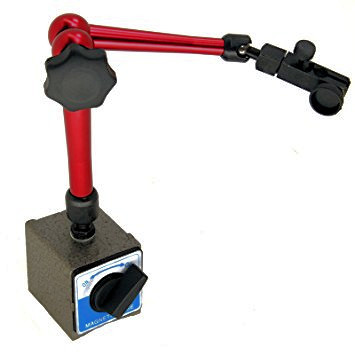
Bought one of these from Amazon for £14.99. Not really expecting too much as the real thing from Noga is usually in excess of £100.00. First thing I did was to stand it on a surface plate to check if the base was flat – it wasn’t! Quite a noticable wobble so I unbolted the arm, removed the magnet and trued up the base. The base seem to be made from two steel parts which sandwich a thick central section made from some soft alloy which I suspect is a lead / zinc or similar mix. Looks like the soft alloy is poured in hot to fix the two outer bits together. A large round magnet sits in the central hole and is rotated by the front lever so that sides are magnetised or not. It has quite a reasonable hold when switched on.

DTI Stand With Magnetic Base

Put the base in the mill and machined it flat, it now sits nicely on the surface plate without rocking. Quite how you can surface grind something with a wobble I don’t know but looking at the original finish it may well have been done by hand on a belt sander. The general finish is pretty well down to the same standard. Looking at the photo you may well think the arms are anodised aluminium. Wrong, they are aluminium but are varnished with a semi-transparent lacquer. The finish on the arms is very soft and easily scratched. The black paint on the base is also fairly soft and covers a deal of filler. The clamping action isn’t very smooth so I took the whole thing to pieces and cleaned it up a bit. The arms are assembled with circlips, well bits of bent wire, there are four of them each one a different diameter and different length.

Once apart the action becomes evident, as you tighten the centre screw two wedges engage with the tapered ends of the rods that run up the middle of the arms. The rods push against the steel balls that make up the pivots. I could tell they were steel because they were rusty! The ball joints were also very rough with a good selection of dents. Polished them up on the lathe to improve the action somewhat. The ends of the push rods were also fairly rough so I polished up the wedge end using a fine diamond lap. I also polished up the wedge faces in the same way. All the originals looked as though they had been done either on a belt sander or an off-hand grinder. Also cleaned up the dimple end of the rods on the lathe using the ball to push a bit of wet and dry paper into the depression in the rod end.

Reassembled everything with some lubrication where needed and it seems a little smoother. I still have to turn the clamp knob quite hard to lock all three joints really solid but it is plenty stiff enough to support a DTI. Was it worth the money? Only just, if I hadn’t had the means to adjust it it would have been no use at all.

Arduino Starter Kit

I recently added a stepper motor to my rotary table based on an article I had seen in Model Engineers Workshop. Everything worked OK but I realised I that I knew very little about the Arduino micro-controller used to power the project. As I can see other uses for stepper motors in the workshop I thought I had better find out a bit about programming the Arduino. To that end I bought a kit from Amazon to play with.

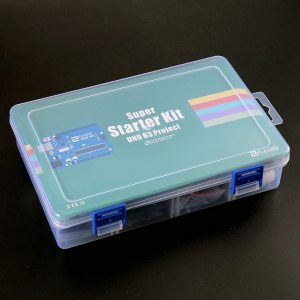
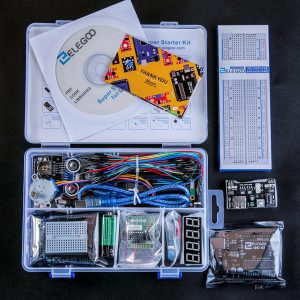
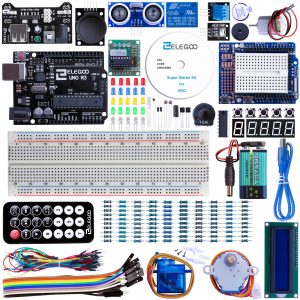
The kit I found was by Elegoo who seem to specialise in this sort of kit and parts for the Arduino and Raspberry Pi. They have some interesting looking car kits for another day. The kit is made in China and manages to get a lot into a a small box. Once you have taken a few bits out it is difficult to get it all back in! I borrowed some images from Elegoo’s website as their pictures are better than mine, I am sure they won’t mind. Click On Image For Larger View

The kit contains an Arduino Uno R3 together with a host of things to plug into it. My particular interest was to find out a bit more about stepper motor control and the kit includes a small stepper motor and driver. It also has a DC motor and a servo to experiment with. There is a CD in the kit that contains the manual, 122 pages in pdf format, which has the lesson notes for 24 lessons. The CD also has the sketches (programs) that go with the lessons. The lessons and sketches are available in a number of languages. I have only just started but the lessons seem to be quite well written and the translation is good so no struggling with “Sino-English”. It may be worth printing out the pdf file as you may need to read that at the same time as inputting program data.

The first part of the manual gives an inventory of the kit contents with pictures so that you can check everything is there. The first lesson explains how to set up the Arduino IDE (Integrated Development Environment) there is a copy of this on the CD but it is not up to date so safer to download from the Arduino site for the latest version. The pdf manual also contains information about driver installation with help if you run into trouble. The lessons start nice and simply with flashing the on-board LED and each lesson introduces a new bit of hardware to experiment with. The manual has plenty of diagrams and clear explanations. The programming examples are clear which is good because I know nothing about C++ which is the Arduino programming language. There is a bit of a glitch at lesson 8 where it refers to an earlier lesson that isn’t there. Also the breadboard power supply is introduced without explanation. Having flipped through the manual, code examples become less as things progress, relying instead on the code supplied with the sketches. The code in the sketches supplied is commented but not overly so.

I think the kit will provide a good introduction to the Arduino particularly the link between computer and machine. I wasn’t aware before I got the kit just how many things can be computer controlled. All I have to do now is set to and work my way through the lessons. Whether I remember anything is another matter but I am quite looking forward to playing. I think I will still need a book on c++ though. Oh I did notice that the name is a bit of a play on words eLEGOo but I am sure that was unintentional (possibly). I note that since I purchased my kit (a week ago) the price has gone up quite a bit.

CNC & CSS

Well, this is the first post of 2016 so you may well think that I have been rather idle. You would probably be right but I have been doing a lot of reading about the benefits and mechanics of CNC. I was using the mill and winding the handle for what seemed like hours and thought it would be easier if this was motorised. So I read up on power feeds and that let on to full automation. Whilst there would be a serious learning curve, CNC would without doubt be useful and in the long run quicker.

Router
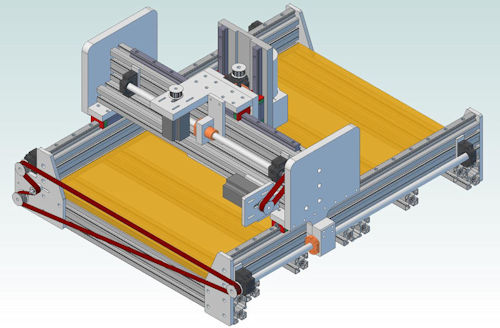
Router Using Aluminium Profile Frame

There are several routes to take: Buy a new CNC mill, Tormach or similar; Convert my existing mill; Get a new mill and convert that or go down the self build router avenue. I quickly decided that a new CNC mill was way out of budget and was initially keen on the router idea and spent some time designing something that coud be built within the limits of my current equipment. Most of the time was taken with remembering how Geomagic Design worked as I don’t use it that often. Converting the current mill I ruled out as it is I think too small and besides I would probably need a mill to modify the mill. Thoughts at present are focussed on buying a new larger mill and converting that. This of course is a decision that might take years!

I have also been tweaking the website a bit. Mainly removing redundant CSS from the stylesheet and altering the menu somewhat. Hopefully I havn’t broken anything. I have also added more links and fixed or removed a few broken ones.