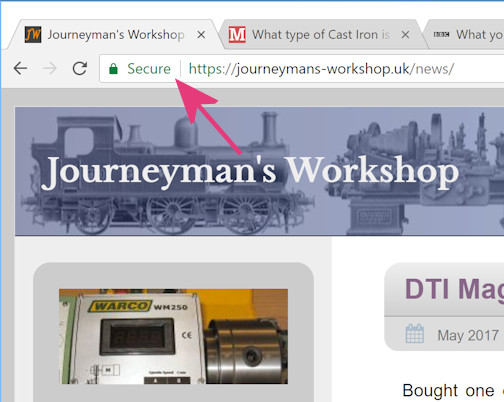
Not so much about the physical security of the workshop, which is of course important, but about the protocol change I have made to the website. Hyper Text Transfer Protocol Secure (HTTPS) is the secure version of HTTP, the protocol over which data is sent between your browser and the website that you are connected to. Google have for some time been promoting the use of HTTPS and give securely connected sites higher ranking.
The first thing you need is an SSL certificate, this has the encryption keys for the Secure Socket Layer communication setup. Fortunately even the cheapest 1&1 hosting package includes a basic SSL certificate and all I had to do to implement it was to activate it from the 1&1 control panel. The basic certificate is fine for a simple website but if you are implementing a world wide trading empire you will need to pay for something a bit more advanced.
That was the easy bit, getting the website in order is a little more tricky. To start with any internal links need either to be relative or non protocol specific that is they should look like //journeymans-workshop.uk/etc and not http//journeymans-workshop.uk/etc. Once this is done the website .htaccess file needs to redirect any calls to HTTPS this is so that all the old links scattered about the interweb end up in the right place. There are several different ways to do this and I just copied the code from the Apache site, the script conventions for these files is way outside my comfort zone! If you need to do this the code that needs to be added looks like this:- <ifmodule mod_rewrite.c>
RewriteEngine on
# Begin Force HTTPS
RewriteCond %{HTTPS} !=on
RewriteRule .* https://%{SERVER_NAME}%{REQUEST_URI} [R,L]
# End Force HTTPS
</ifmodule>
Browser View
With that done the next major job is to update the WordPress database so that the media links are right. WordPress stores all the links to photos as complete hyperlinks including the HTTP bit so these need changing. The easiest way to do this is with a plugin. I used Better Search Replace which is fairly simple to use and does a dry run before it alters the database. The image to the right shows the browser result when everything works but I put it in to test that the new images are stored with the correct protocol – it seems to work!
Next job is to sort out Google, as you can see I use their ads on the site and it just about pays for the hosting and domain fees. I had to re-write the XML sitemap with the new HTTPS addresses but also had to add the HTTPS version as a new site? I only have one set of files but for reasons best known to themselves Google want each version of the site shown separately. So you end up with:- https://journeymans-workshop.uk/
https://www.journeymans-workshop.uk/
http://journeymans-workshop.uk/
http://www.journeymans-workshop.uk/
Which strikes me as a little odd but it seems to be what they want. Once this is done sit back and wait for Google to crawl everything. It is fairly difficult to check if all is working correctly and you need to keep clearing the browser cache to make sure you are looking at the latest version. Touch wood everything seems to be working. It is interesting to note the number of old links stored on the web, I was going to remove my old cign.org and cign.net sites but there are still loads of places that have these recorded.
Did I really need to do this – probably not but I learned a bit on the way and in theory my Google ranking should go up for what it′s worth.
Just a quick update, a few months after doing this I checked Google and there was absolutely nothing happening on any of the “sites” other than the https://journeymans-workshop.uk/ so I deleted the other three. Whether this was the right thing to do remains to be seen but I thought it was neater.
I recently added a stepper motor to my rotary table based on an article I had seen in Model Engineers Workshop. Everything worked OK but I realised I that I knew very little about the Arduino micro-controller used to power the project. As I can see other uses for stepper motors in the workshop I thought I had better find out a bit about programming the Arduino. To that end I bought a kit from Amazon to play with.
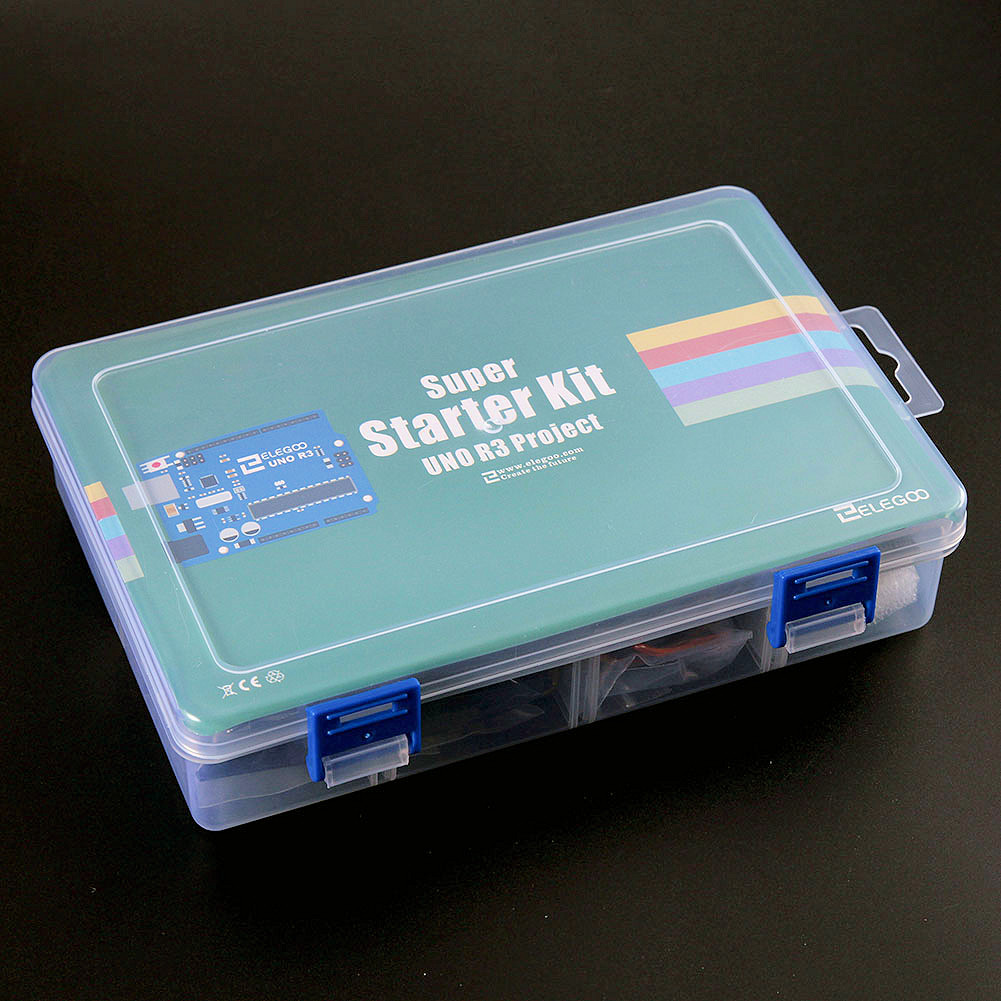
The kit I found was by Elegoo who seem to specialise in this sort of kit and parts for the Arduino and Raspberry Pi. They have some interesting looking car kits for another day. The kit is made in China and manages to get a lot into a a small box. Once you have taken a few bits out it is difficult to get it all back in! I borrowed some images from Elegoo’s website as their pictures are better than mine, I am sure they won’t mind. Click On Image For Larger View
The Kit
As Packed
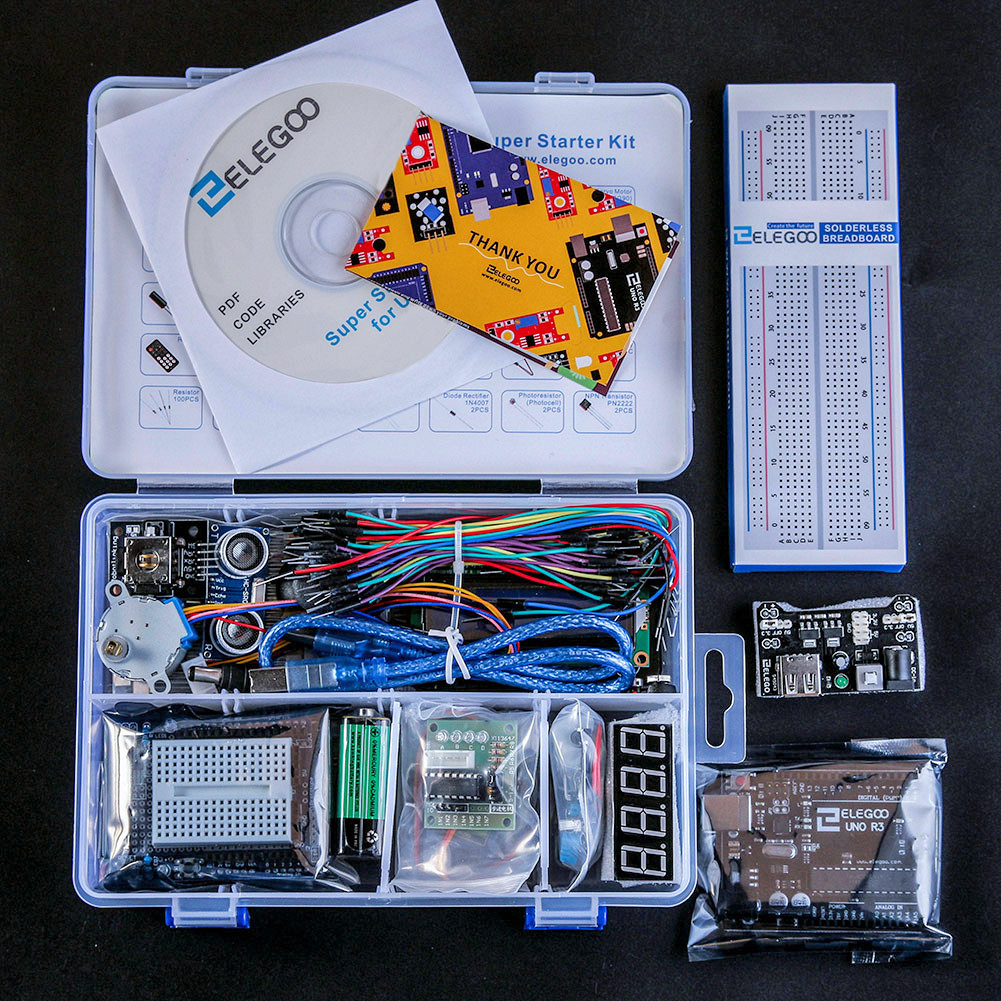
Kit Contents
The kit contains an Arduino Uno R3 together with a host of things to plug into it. My particular interest was to find out a bit more about stepper motor control and the kit includes a small stepper motor and driver. It also has a DC motor and a servo to experiment with. There is a CD in the kit that contains the manual, 122 pages in pdf format, which has the lesson notes for 24 lessons. The CD also has the sketches (programs) that go with the lessons. The lessons and sketches are available in a number of languages. I have only just started but the lessons seem to be quite well written and the translation is good so no struggling with “Sino-English”. It may be worth printing out the pdf file as you may need to read that at the same time as inputting program data.
The first part of the manual gives an inventory of the kit contents with pictures so that you can check everything is there. The first lesson explains how to set up the Arduino IDE (Integrated Development Environment) there is a copy of this on the CD but it is not up to date so safer to download from the Arduino site for the latest version. The pdf manual also contains information about driver installation with help if you run into trouble. The lessons start nice and simply with flashing the on-board LED and each lesson introduces a new bit of hardware to experiment with. The manual has plenty of diagrams and clear explanations. The programming examples are clear which is good because I know nothing about C++ which is the Arduino programming language. There is a bit of a glitch at lesson 8 where it refers to an earlier lesson that isn’t there. Also the breadboard power supply is introduced without explanation. Having flipped through the manual, code examples become less as things progress, relying instead on the code supplied with the sketches. The code in the sketches supplied is commented but not overly so.
I think the kit will provide a good introduction to the Arduino particularly the link between computer and machine. I wasn’t aware before I got the kit just how many things can be computer controlled. All I have to do now is set to and work my way through the lessons. Whether I remember anything is another matter but I am quite looking forward to playing. I think I will still need a book on c++ though. Oh I did notice that the name is a bit of a play on words eLEGOo but I am sure that was unintentional (possibly). I note that since I purchased my kit (a week ago) the price has gone up quite a bit.
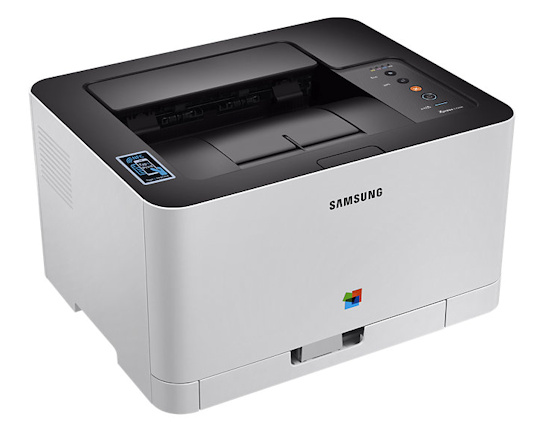
I don’t print all that much but it would be nice to have a printer that worked when you need it. Due to lack of use the ink cartridges always seemed to be clogged up when I needed to print something. This resulting in a lengthy cartridge cleaning cycle that never worked properly and wasted ink. A new set of cartridges cost almost as much as the printer so I thought it was time for a change. I reasoned that a laser printer wouldn’t ‘dry up’ if not used, as the toner is already a dry powder. Laser printers tend to be a bit bigger than inkjets but a bit of research came up with the Samsung C430W Xpress, a small footprint colour laser printer.
Samsung C430W Xpress
The printer was ordered on ‘Black Friday’, more by luck than planning, but was priced at £85.00 rather than the usual £129.00. It was also at the same time subject to a Samsung promotion of an extra set of toner cartridges to be claimed later. Also had an extra years warranty courtesy of John Lewis. Despite the best efforts of the courier the printer turned up eventually, the outer packaging was a bit battered but the box seemed to have staved off most of the results of being ‘in transit’ for 10 days!
Unpacking was straightforward and there was plenty of styrafoam to protect the printer in it’s box. The printer was basically ready to go once all tape holding covers and trays in place had been removed. Even the toner cartridges were in place and ready to run without any preparation. First thoughts are that the plastic case seems a bit flimsy, everything bends and creaks when pressed. The paper tray seems very light duty, time will tell whether it is up to the job. The printer is quite heavy though so there must be a reasonable amount of metalwork holding it together somewhere under the flexi-covers.
Big disappointment was that the paper tray sticks out the front when loaded with paper. This is not made clear in any of the sales blurb or even the specification. There are no pictures anywhere with the tray sticking out at the front, I think this is a bit remiss of Samsung not to mention this as it adds 90mm to the depth. The footprint with the tray in shipping mode is 380mm wide, 310mm deep, 210mm high. The depth in normal use mode is 400mm. The paper tray expands the first time you pull it out and clips into it’s new larger footprint. If you remove the paper, the tray does not shrink back to it’s original size without a bit of effort to find the clicky somwhat flimsy locking tab. If you only want to use A5 paper, it will work with the tray concertina’d in, which restores the advertised footprint.
Once over that annoyance (I decided I could live with the ‘new’ footprint) I installed the drivers and set the printer up. There is a CD with the drivers but my PC doesn’t have a CD/DVD drive, fortunately the drivers are also downloadable from the Samsung support site. Not quite sure what happened with the driver installation but I seemed to end up with three printers. That was probably a combination of me not reading the instructions carefully, Windows 10 and the downloaded drivers. However I gave it a quick test on the usb cable which seemed to work OK and then deleted the printers in device manager and used the usb cable to set up for a wireless network setup. Everything now works fine with just the wireless network connection and just one printer showing in ‘Devices and Printers’. I can even print from my phone and tablet though I am not quite sure why I would want to.
The text print quality is good and the printer makes a nice job of my Geomagic Design drawings. The photo quality is OK but not up to my old inkjet standard, I didn’t really expect anything different. It might perform better with a better quality paper, I believe you can get special photo paper for laser printers. The printer is quite quick once it is printing although there is a delay before it gets going. I haven’t timed it but I am happy with it. The network connection seems solid (at the moment) and there appears little difference in timing whether connected with a usb cable or over the wifi. The controls on the printer panel are just the on/off button, a WPS button, a stop button and an ECO button. I haven’t explored the so called eco mode but it’s main claim at savings seems to be the ability to print two or more pages on one sheet. The graphic in the properties display proudly claims that you can save 50% toner by printing two pages on one sheet! Probably, but it will be half the size, I have enough trouble reading full size print, thankyou…
The printer seems to be reasonable value for money, especially if you can find it on offer somewhere. Print quality is good but don’t get it for your photos. Casing and paper tray seem a bit flimsy but there is plenty of weight inside. My only other criticism was the labels stuck all over the front, I really don’t need all the store display advertising permanently stuck to the front! At least make the labels easy peel, I had to spent 15 minutes with a bottle of foul smelling label remover to get everything off. A full set of toner cartridges will cost more than I paid for the printer. The colour cartridges are rated for 1000 pages and the black for 1500. I am hoping that with the spare set of cartridges from Samsung’s offer I shouldn’t need to buy any more before the printer wears out.
The “Get Windows 10” icon appeared on my desktop some time ago and about a week after the official release date
the upgrade downloaded itself onto the computer. I had played with the preview program on an old laptop so I was aware
that there could be problems so rather than run the upgrade on my main PC I did a trial run on the laptop.
The laptop originally had Windows 7 but then Linux and most recently the Windows 10 Insider Preview. I reloaded Windows 7
from the original recovery discs and used a downloaded ISO on a USB stick to upgrade to
Windows 10. Getting the ISO for the USB was straightforward just go to Download Windows 10,
select 32 or 64 bit and the media creation tool will make a bootable USB drive for you. The upgrade was surprisingly quick
and everything worked first time, the drivers all appeared to work and the serial number
from the old Windows 7 automatically activated the new install. I decided then to do a clean install on the laptop just to
see how that would go.
I formatted the drive and did a clean install from the USB stick. Everything installed first time without difficulty except
for one Intel chip driver which went astray but it was soon found and downloaded. Windows upgrade ran almost at once and found a couple of
updates and that was it. The laptop whilst old is still quite a good spec but I keep it mainly in case the newer desktop
suffers a major outage. I spent some time exploring all the settings which are easy to find from the start menu and quickly
discovered that Windows 10 wants to connect you to the world. Being a bit of a dinosaur I am not keen on “clouds” and
“social media” and being permanently “connected”, so I spent some time switching the modern era off!
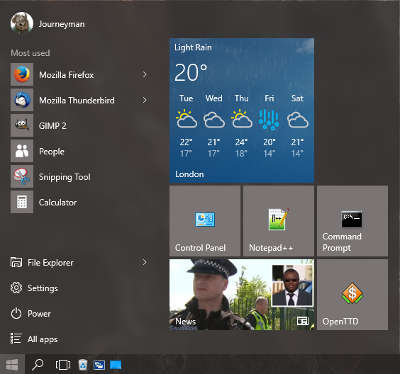
Start Menu
Everything appeared in order and I quite like the look and feel of the new Windows so I played with the start menu and set
about customizing that. My version of customizing was basically to remove all the apps and leave just a few useful live
tiles like the weather and news but it is quite easy to add and remove programs. A program is dinosaur speak for an app.
You really do want to check all those option switches though, otherwise you could be supplying the neighbourhood with downloads
via any open WiFi networks about.
A Bit of a Pane
Once happy with the laptop I let the main PC upgrade from it′s downloaded file. I was still a bit wary as this is a slightly
more up to date desktop PC that came with Windows 8 but no media and no “product key”. All the software details are held in firmware (UEFI)
on the motherboard so you can′t do a clean install until an upgrade has been activated, then hopefully the details
are logged on Microsoft′s database somewhere. The upgrade from 8.1 went well and everything was working, all the old programs functioned
the desktop personalizations were all there and I was quite pleased. I was busily disallowing everything when Windows Update found some
new updates. I rebooted…
To cut a long story short No WiFi, well I could see my router but Windows kept saying “Cannot Connect To This Network”.
I can report that the Windows 10 trouble shooter is about as much use as a chocolate teapot, indeed as it was in previous incarnations.
I reloaded drivers searched the web (using the laptop) for updated drivers but nothing
wanted to work. Fortunately the Windows 10 installation had activated so I was semi confident that if I reset the PC it would remain as
a legitimate install. A reset basically leaves all your files and programs intact and reinstalls Windows. I took a deep breath and
pressed the button. The reset took much longer than the upgrade did. Windows came back replete with WiFi and then began the pain of reinstalling
all the programs. The reset doesn′t delete programs from the computer but they are no longer installed. Anyway I had some of the more useful
programs back in place when Windows Update tells me it wants to restart (you can′t turn it off but you can alter when it does restarts).
Reboot and… no WiFi, the air is now turning a somewhat deep shade of blue.
Belated Brainwave
One more go, this time a clean install of Windows 10. Fortunately the computer has an SSD, which I added, for the operating system
and all the programs, data and photos are on another drive. This makes it a little easier as the SSD can be repartitioned
and formatted without losing anything useful. You can probably tell where this is going by now, a clean install of Windows 10 and
everything is working, one update later and the WiFi disappears. I now have no idea how to get this going save a long ethernet cable
up the stairs when the somewhat addled brain remembers that I have an unused USB WiFi adaptor in the workshop. Five minutes
rummaging later I have a TP-Link TL-WN822N 300MBPS WiFi adaptor plugged in and working. There is an upside to this as the TP-Link
adaptor is much faster than the built in Lenovo card and I can now get in the region of 90 Mbits/s over WiFi which aint half bad.
Another hour resetting switches and installing programs and everything is working as it should be.
So eventually with everything back to normal I have checked all my old software and am pleased to report that Geomagic Design works so that
I can produce drawings. XAMPP works so that I can test bits of the website without the need to upload files. I have yet to reinstall Adobe
Photoshop Elements or Premiere Elements as Adobe always loads a stack of unrequired sneaky software that wants to run all the time.
I have been playing with the GIMP which is a free image processing program which seems to do most things I need albeit a little differently. I
usually have a few browsers loaded for testing purposes and the new Microsoft Edge seems to work happily alongside the others although it
hasn′t seen much use yet. Libre Office provides for all my office type needs and works as does Notepad++ which I use for editing the
website.
The Other PC
I have another PC in the workshop which is useful for checking drawings and looking up the odd bit of data when working on a project.
Just to keep all the computers singing from the same songsheet I upgraded this as well. I used the same USB stick to upgrade rather
than a clean install. The workshop PC is connected to the interweb but being some way from the house the WiFi signal has to
crawl across the garden to get there, so the USB was much quicker than downloading about 3GB of data. This was an upgrade from
Windows 7 and everything went smoothly. All my old settings were retained, all the old programs worked even the screen background
and taskbar layout remained as they were in Windows 7. I must say I was quite impressed especially as the WiFi remained working and that′s
how it should have been for my other desktop PC. Still I suppose with a million and one possible variations of hardware, software, drivers amd devices
something is bound to go awry with such a massive worldwide software extravaganza, it’s just annoying that it was on my system.
I still had to spend quite sometime though finding all those switches and disconnecting myself from modernity.
Some of Those Switches!
All in all the upgrade was OK spoilt only by the WiFi driver problem, at least I assume it′s a driver I haven′t got
to the bottom of that yet. I expect that at some stage a new driver will appear and the system will connect again but I am not really bothered
as the new WiFi adaptor is much quicker.
My first thoughts on Windows 10 are that it is an improvement over 8.1. I like the style and the return of the start menu suits me much better than the Metro tiles of 8.1. Windows 10 seems stable thus far and my old software works without problem. My only real dislikes are the way it wants to connect and be online all the time and I would like an option to remove the lock and login screens which are a bit unnecessary as I am the only user. Just remember to go through all those option switches (yes, I know I am repeating myself).
Have I turned Cortana on? I think not, I have enough trouble with a mouse and keyboard without the damn thing talking to me.
Not I hasten to add a passing Native American but the server software that empowers a good deal of the interweb. Well the new site has been up for a couple of weeks with no major problems detected. I have however had some trouble trying to implement some of the Google Page Insight suggestions to improve the site speed and efficiency. This is mainly aimed at getting the site in a suitable state to use Google Adsense. As you can see I have put ads on the site and the main hope is that these will generate enough income to pay for the hosting. I don’t anticipate much in the way of posh cars or exotic hoidays!
Cache Control
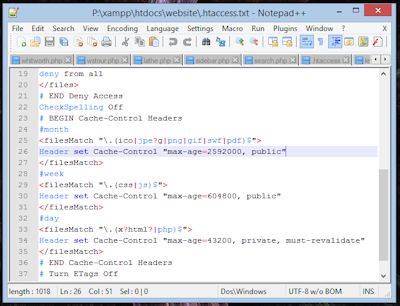
One of the things suggested is to “Leverage Caching”, what they mean is turn caching on. A bit of reading explains that pages cached locally by your browser make for quicker loading times. Unless told otherwise a browser like Firefox or Chrome will download the page and it’s content fresh every time you want to view it. If you set a few commands in your Apache .htaccess file you can tell browsers to save things locally and use them on subsequent visits to the page. There are a couple of different commands to do this one being Mod_Expires, which basically tells the browser how long to keep a file before downloading a fresh copy The other being Mod_Headers which does a similar job but with more options. I am a complete novice in this area and had to read a lot before I got a rough idea what to do. I think I have things set up with some fairly short term cache directives at the moment until I have finished playing with the site.
Whilst setting directives with the .htaccess file is OK for static files – images, css, script files and the like, it will not work for the php files which are of course generated dynamically. To affect caching for these files I discovered that you need to put a header directive at the top of each file that looks something like < ?php header('Cache-Control: max-age=604800'); ?> which must be the very first line on the page. This tells Apache to send HTML headers that allow caching for up to 7 days. In case you were wondering HTML headers are nothing to do with the page that appears in your browser window, they are rather part of the interchange that goes on transparently between your browser and the server (something else I learnt).
Compression
Editing .htaccess in Notepad++
Having got caching sorted the next thing Google suggested was compressing pages using GZIP. Apparently all modern browsers are set up to ask for compressed pages, it’s in those HTML headers. The browser asks the server to send a page and says oh if you have it Gzipped I am quite happy to accept that, thankyou. Apache dutifully replies and if it can, squeezes the page before it goes, thus reducing the amount of data flying over the interweb. By this time I am an expert on rewriting the .htaccess file and duly add some Mod_Deflate instructions that are the standard way of telling Apache to GZIP everything it outputs. A quick test and… Nothing and definitely not ZIP. More reading and it transpires that my hosting company, 1 and 1, do not enable Mod_Deflate on their servers. Scratch head and send e-mail to Tech Support who reply quickly and apologetically saying I can use Zlib. Lots more reading.
Zlib is part of PHP and has, in my view, very poor documentation. Eventually I found out how to enable it using a php.ini file and switched it on. A quick check with Firefox Element Inspector showed that it was working. A more detailed look showed that it was working but the caching headers seemed to have switched themselves off. Now I am confused (it doesn’t take much), looking at Google Page Insights also showed I was getting 404 (page not found) errors, now I am really confused. Turn compression (Zlib) off and everything is working again. I did a few tests just to make sure I wasn’t seeing things but with Zlib on pages, except the home page, were still being served OK but with a 404 response and with the wrong HTML headers. I turned Zlib off and e-mailed Tech Support again, this time they seem to have headed for the hills! A couple of days reading, most of which was way over my head, I found one comment in the PHP documentation that suggested there was some vague bug where if you called Zlib with its standard zlib.output_compression = on it could corrupt headers but if you enabled zlib with a buffer size zlib.output_compression = 4096 it would work. I tried this without much hope but to my surprise it seems to have worked. I now have HTML headers with cache control set, Gzipped output for PHP and no 404 errors. Result!. I still need to sort out compressing CSS and JS but these files are already minified so they are not going to get much smaller.
Security
Whilst fighting Apache’s .htaccess I thought it would be a good idea to add some of the WordPress recommended security fixes. This meant playing with Mod_Rewrite. Now I have used this before and never understood it. as far as I can see Mod_Rewrite uses a language that is entirely written in punctuation marks and makes no sense whatsoever. I therefore resort to the time honoured method of finding something similar on the interweb and tweaking it until it works or explodes completely. This isn’t the best approach as Mod_Rewrite is very powerful and a slight error could have a myriad of unseen consequences. At this moment in time I seem fortuitously to have hit the right buttons. There are many articles regarding WordPress security so I wont go into detail save suggesting
An article in Smashing Magazine and the WordPress Codex.
There is still a slight problem with Google having some spurious links recorded but I think these came about when I was in the process of changing the domain name and I had three seperate domain names all pointing at the same site. Not a good idea, hopefully the duff links will drop off soon. I have no doubt that there are still some gremlins lurking in the works somewhere but they will eventually be tamed as per the Apache.
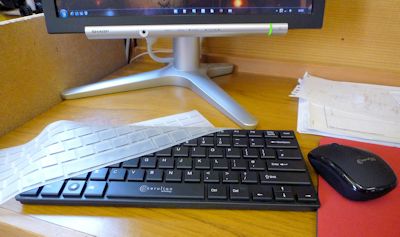
Whilst tidying up I moved the computer and managed to break the wireless dongle for the keyboard and mouse. I only have a small fold down desk in the workshop and a full size keyboard covers nearly all of it. I found a replacement mini keyboard and mouse set from Maplins – Cerulian Mini Deskset ref:N69JX.
Cerulian Mini deskset
This deskset comes with a mini dongle that only sticks out about 6mm so I shouldn’t be able to snap it off like the old one! The keyboard has quite a nice action and takes up very little desk space so should be fine for the small amount of use it will get in the workshop. As an added benefit it comes with a thin moulded silicone plastic cover, which I assume is packing, but will serve very nicely as an oil proof membrane as it is sufficiently transparent to see the keys through and very flexible. The mouse has a power saving feature and powers down after a few minutes of being idle, just click to wake it up.
UPDATE April 2015 – I bought another of these for use with my desktop computer, I notice that Maplins now sell it under their own name. With more use I have noticed that if you don’t hit the keys centrally sometimes a key will stick slightly, this doesn’t bother me particularly but a typist would probably find it annoying. I also tried it out with my so called “smart tv” it works OK but the range is not really more than about 2 metres for a reliable connection.