Chip Guard for WM 14 Milling Machine
The WM 14 mill only has a handle on the right hand end of the table thus if you are getting a shower of hot chips on your hands you can′t switch to the other end as you could on a larger machine. To overcome this problem I thought a chip guard would be a good idea.
I could only think of a few simple design criteria for such a device these being:-
- The guard should not obstruct vision of the work in progress.
- It should be able to be deployed easily and quickly.
- It should be unbreakable or as nearly so as possible.
- It shouldn′t get in the way when not in use.
Clear polycarbonate sheet fulfills the requirements it is as clear as glass and tough as you like, they make riot shields from it, so it should be OK for this application. It is not as cheap as some other plastics but is far easier to work with than say acrylic which is quite brittle. Only slight drawback to polycarbonate is that it will scratch quite easily.
To keep out of the way when not in use and to deploy easily would suggest a fold out screen of some sort. The only place to affix the screen would seem to be the column so that′s where I started. The column is cast iron but this is quite soft and easy to drill and tap. I was going to fix hinges directly to the column but a bit of trial and error with a hinge and some plywood showed that this limited the swing of the screen to just over 90° due to the thickness of the sheet. Using a section of aluminium angle improves the swing to nearly 180°. I settled on a layout as shown in the drawing on the right. I don′t know if this is the best layout for the hinges but it seems to work.

I obtained a 610mm (2′) square of 4mm thick polycarbonate from a garden supplier who sells it for replacing greenhouse glass (1). You can also get thinner sheet but I thought this might not be rigid enough.
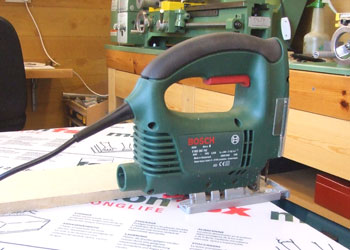
I clamped the sheet to a workbench and used the clamp as a straightedge to guide the saw. I found that a jigsaw with a medium blade cut the sheet very easily and quickly (2). The blade used was one of the Bosch Progressor blades which has finer teeth nearer to the saw (3). The final cut was quite acceptable and only needed a little cleaning up (4). You can file the cut edges but the file clogs up very quickly. I got better results by using a small block plane which worked well, provided that I used a fine cut and pressed down quite hard. The plane blade will probably need sharpening before I use again on wood.
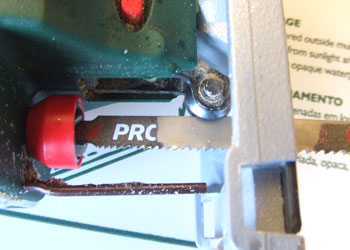 3. Bosch progressor jigsaw blade
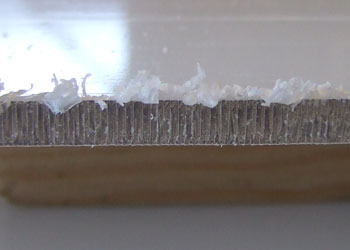
Having cut the three sections of the screen - 1 piece 225mm x 75mm and two pieces 225mm x 150mm I also needed 3 lengths of piano hinge at 225mm and one piece of 15mm aluminium angle also 225mm long. The aluminium angle was simply drilled at the appropriate centres to fix the piano hinge and then on the opposite face I milled two small slots for bolting to the mill column, the slots afford a degree of height adjustment, just in case! The polycarbonate sheet is very easy to drill and shows no tendancy to crack, I used a hand brace but a power drill or bench drill would work just as well.
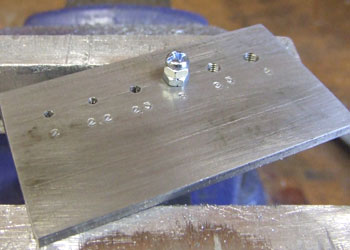
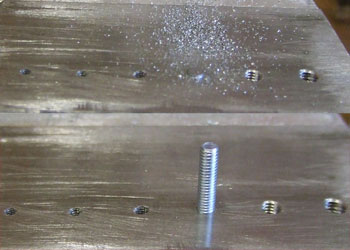
Next came the longest part of the operation, bolting it all together, well not so much the bolting but cutting all the bolts to length. I had recently made a screwplate for another job and this was put to good use (5). Simply pack the bolt to length with a couple of nuts, screw in tight so that it doesn′t come loose when filing. Chop as near to the plate as possible with side cutters and then file flush. Sounds quick enough for one bolt but when you have 24 it takes a little longer. The screwplate was made from a piece of scrap plate, not a pretty job, especially the number stamping, but it works. Photo (6) shows a before and after shot - ready to start at the front and finished at the rear.
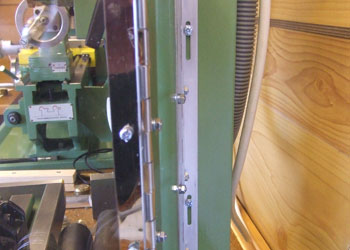
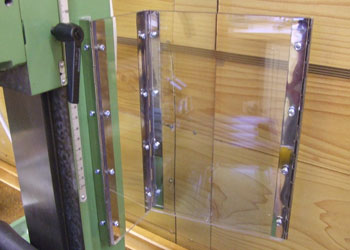
The slots in the angle worked well (7), when fixing this to the column I let the screen rest on the table to mark the fixing holes in the column and once fixed simply slid the screen up by about 3mm to clear the table. The 75mm wide section of screen nearest the column allows the screen to clear the clamp levers and quill handle on the righthand side of the mill head (8).
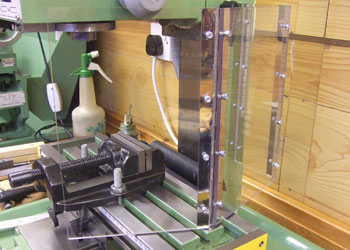
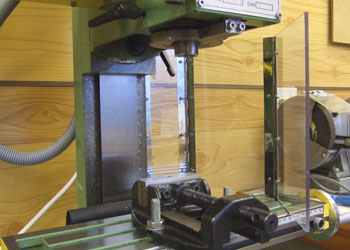
When not in use the chip guard folds away to the rear of the column (9). As you can see from the photos the polycarbonate sheet is crystal clear I wonder what it will look like after a few months use? I have left the corners fairly sharp on the last section in case I need to add another panel to fold around the front at a later date (10).
Update - 2017
Whilst it is useful to have the guard I have only used it a couple of times, it spends most of it′s time just folded back on the column. Perhaps I have just got used to being showered in hot swarf!