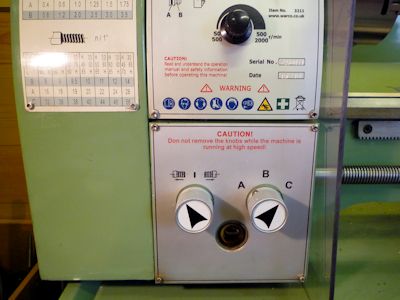
WM 250 Lathe - Maintenance
The oil level in the leadscrew gearbox was getting a bit low, what with time and a minor leak, so I decided to do an oil change. The manual says to use Mobilgear 627 but this is no longer available so I got some "gear oil" from Halfords reasoning that if it says it′s for gears and it′s going in a gear box, then it will most likely work. The oil in question is "EP 80W90 GL-4" this is marginally less viscous than the recommended oil but should still do the job, especially with the light use my lathe gets.
I wasn′t intending to do a write up but events revealed a small project in the offing so I got the camera out... Once I had started to drain the oil it became apparent that you couldn′t get all the old oil out without removing, or at least loosening, the gearbox cover. I decided to remove the cover to give the inside a good clean up and as soon as it was off realised that it would be easy to install a drain plug that worked for future use.
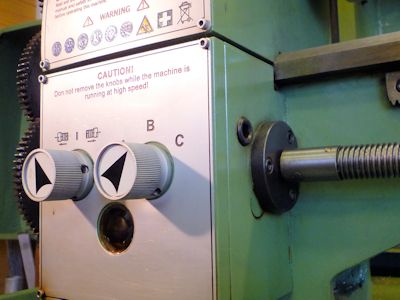
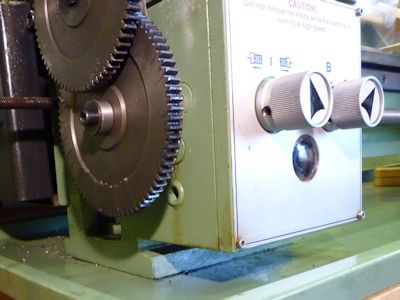
First thing to do is to loosen both the filler and drain plugs. The filler plug is easy to get to on the right hand side of the gearbox just above the leadscrew (1). The drain plug is a little more inaccessible and the change gear cover and probably the leadscrew change gear will need to be removed (2) to gain access. The drain plug is about 25mm above the bottom of the gearbox so not really much use. I found that both the plugs had been screwed well home and needed a bit of effort to loosen, fortunately I have an Allen key with a long handle.

Health & Safety - You may wish to wear disposable gloves whilst dealing with the oil, as it smells foul and lingers on your hands forever despite copious washing. It is probably a likely cause of dermatitis as well.
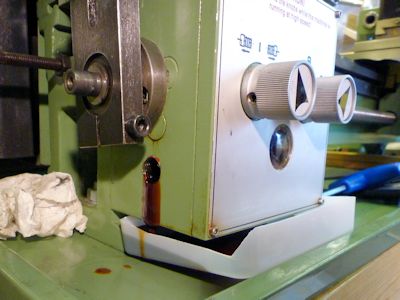
Once you have drained as much as possible using the drain plug (3), it is time to remove the gearbox cover. Remove the four small cap screws that hold the aluminium plate in place to reveal the cover proper (4). Loosen the five cap screws, two at the top and three at the bottom. The four deep holes give access to the screws that hold the gearbox casting to the front of the bed. The front cover is stuck to the gearbox with liquid gasket and will need a thin blade screwdriver or knife blade to break the seal and lever the cover off. Keep hold of the cover, there are no dowel pins or similar to stop it dropping into your oil tray! You can see the staining on the cover caused by the oil leak I had from the sight glass. The cover comes off easily and brings with it the gear shift knobs and actuators, fortunately there is no need to remove the knobs or any of the mechanism.
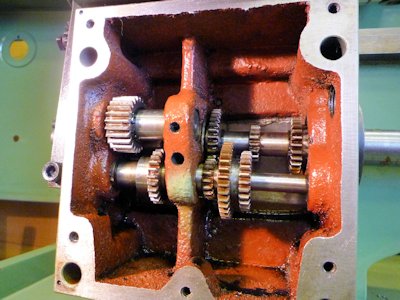

Once the oil was out and all the spillage wiped up I gave the inside of the gearbox (5) a good clean using WD40 and paper towels. You need to be careful doing this as there are some really sharp edges. Cleaning up is a bit awkward without removing the gears and the casting surface is very rough but I am hoping that the WD40 has flushed out most of the detritus. There was a bit of sediment on the bottom of the box and some of the liquid gasket material that had found it′s way inside. I noticed that the tumble reverse gear, top left, was oil free and dry. I don′t think much oil gets up there if the oil level is a bit low. Probably no splash lubrication either as the gears only rotate fairly slowly in normal use. It may be that the gear at the front has not been in use as it only rotates when the leadscrew has been reversed (driving the carriage to the right) which I can′t remember ever using.
The inside of the cover was fairly clean (6) just a bit of gasket residue which cleaned off easily but the stain from the oil seems permanent. The mechanism is quite simple the two U shaped actuators just fit over the appropriate gear wheel to push the gear cluster left or right. The inner sight glass plastic moulding (the white bit) had a lot of flash around it and one of the three centre legs had broken so I levered it out and cleaned it up. It came out very easily and doesn′t seem to serve much purpose, possibly keeping the rubber from crinkling. As one leg had already broken I removed the other two along with moulding flash and pushed it back into place.
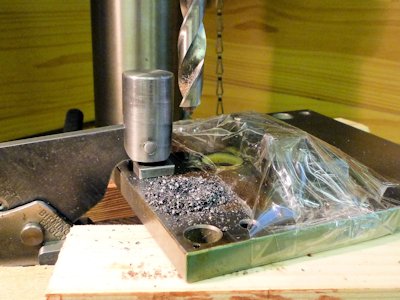
With the cover off it was plain to see that a new drain plug could be fitted in the front panel which would be right at the bottom of the gearbox rather than half way up like the old one. A few quick measurements and the location for a new drain hole was centre punched on the inside of the cover. I decided that an appropriate size would be M12 and drilled a 10mm hole (7), the correct tapping drill is actually 10.2mm but I don′t have one. I clamped the plate to the drill table with a couple of bits of wood for packing to lift it enough to clear the knobs. I discovered that the plate is actually cast iron and really soft, so having a slightly smaller drill was no problem. To avoid swarf in the mechanism I covered the sensitive parts with tape and vacuumed before unclamping. I tapped the hole by hand, holding the plate vertically in the bench vice. I used a taper tap and only tapped the full thread form about ¾ of the way through so that the plug would have something to tighten into.
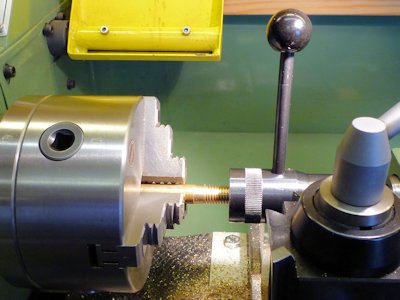
I made a plug from brass which meant covering up the gearbox while I turned it to prevent ingress of brass swarf and I also had to thread it by hand in the lathe (8) for obvious reason. I was going to make a fancy plug with a rare earth magnet built in which is why the one in the picture looks rather long but I discovered that the magnets I had were a bit on the large size to go through the drain hole so I opted just to drop a larger magnet inside the gearbox to collect any errant particles.
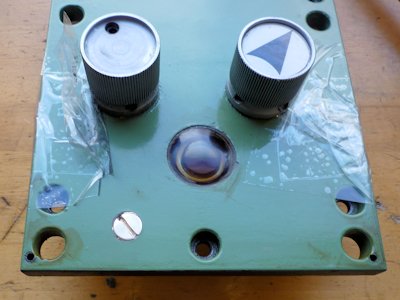
I made a screwdriver slot in the front of the plug just using a hacksaw, crude but effective. More by luck than judgement, the plug tightened up nicely with some PTFE tape around it, to finish flush both front (9) and rear. Whilst moving the front cover assembly about, the arrow marker fell of one of the control knobs, I stuck it back with double sided tape once everything was finished. You can also see the slightly altered white plastic ring inside the sight glass (10) I hope removing the spokes doesn′t cause any problems.

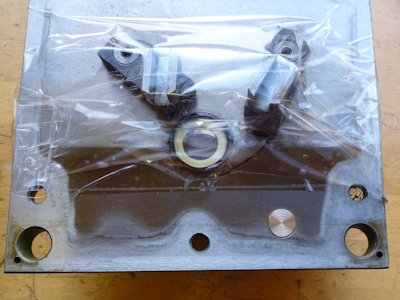
Reassembly requires either some liquid gasket compound, which I didn′t have or a new paper gasket. I opted to use strong brown wrapping paper which is cut out to the right shape and held in place with some grease (11). The grease makes it easy to place the gasket and if you put a thin layer on top as well, makes it easy to slide the cover about without tearing the gasket. You can see, lower left, the rare earth magnet I dropped into the base of the gearbox to collect any small metal particles that get into the oil. I don′t think this is really necessary as anything solid will simply settle to the bottom as the oil isn′t going to move much. I mentioned earlier that the tumble reverse appeared dry so I gave it a spray with some white lithium grease, reasoning that if the oil does get up there it will wash the grease off and if it doesn′t then the gear will still have some lubrication.
Replace the cover making sure that the U shaped actuators re-engage with the gear wheels correctly and put in a couple of the cap screws to hold the cover in place. Turn the lathe by hand and check that all the positions of the control knobs are accessible and doing what they are supposed to. Once satisfied replace all the screws and tighten up. Put in the old drain plug with some PTFE tape and if not already in place, fit the new drain plug in the front panel.
Now put in the new oil, the plastic bottle came with a built in flexible tube which makes it easy. Once the oil is at the right level, I filled it just over half way up the sight glass, put in the filler plug with some PTFE tape. Replace the aluminium front plate, clean up and everything should be as good as new (12). The manual recommends changing the oil once a year but I don′t think mine will get any more attention for a good deal longer than that.