Flexible Work Light
I needed some low voltage lamps for the milling machine and the lathe but was put off somewhat by the high prices I found advertised so I decided to see if it was possible to make something useable. Whilst walking around a large DIY store I came across low voltage lamps designed for the garden and decided that one of these would make a good starting point. I was trying to work out how to build a suitable articulated arm when I discovered that Maplins sell quite reasonably priced what they call a microphone gooseneck, this is a stiff but flexible tube with screw fittings at either end. I bought one of these and a gooseneck base and I had all the makings of a low voltage lamp (I already had a suitable lamp transformer gleaned from some long expired household light fitting). All I had to do then was to fit the parts together.

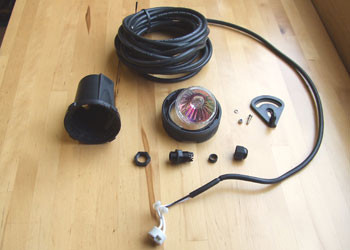
The lamp is described as a "pond light", it has a glass cover with an o-ring seal and the cable gland looks to be watertight. I don′t know if it is designed to work under water or simply at the side of a pond but it should survive coolant and oil splashes without problem. The case is plastic and so far has withstood normal use without melting, it does get hot! The microphone gooseneck is available in three lengths, this is the longest 19", the mounting flange is threaded to screw into one end of the gooseneck (1).
The first thing to do with your brand new light is to take it to pieces (2). The supplied lamp is a 20W halogen unit which I find quite bright enough. I don′t think I would try a larger lamp it could well overheat. The light is supplied with a small adjustable bracket which might be useful for attaching the light where not much adjustment is required, for this project I discarded the bracket. The lamp holder is ceramic with a couple of short lengths of heatproof cable pre-fitted this is joined to the main cable with insulated crimp connections. I decided to leave this intact and pull the cable out the long way, feeding it all through the gland, as can be seen the light is supplied with a few metres of cable.
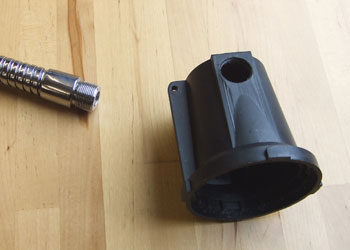
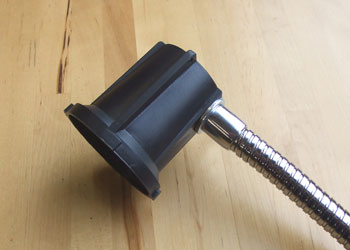
The plastic lamp housing is quite thick and I found that if the cable hole was carefully enlarged with a file it could be screwed on to the gooseneck (3). The thread on the gooseneck does not go all the way to the collar so I fitted a thick washer between the housing and the gooseneck (4). Once these two parts fit together nicely I smeared the thread and washer with a little epoxy adhesive and screwed them together.
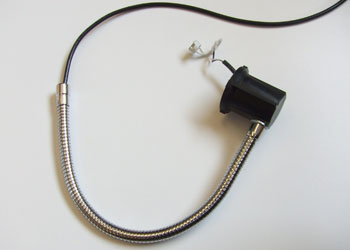
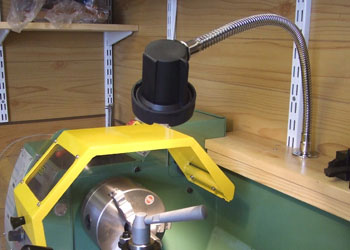
Once the adhesive has set the cable can be threaded back through the lamp housing and down the gooseneck (5). This takes some time as the only way to do it is to push the cable from inside the housing a little at a time. Replace the lamp and screw on the front cover and glass and the unit is ready to go. This particular unit was for the lathe and I fitted the gooseneck base to the shelf at the rear of the lathe (6). I already have a lamp fitted to the mill and will be adding a similar unit to the drilling machine.
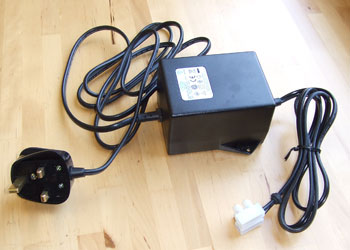
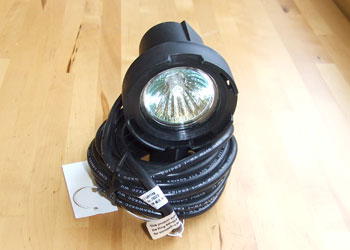
A suitable lighting transformer can be obtained from an electrical wholesaler or large DIY store (Screwfix Direct stock several types). These are suitable for single lamps and may be built into the machine or a suitable enclosure. An alternative is to purchase a transformer designed to work with these garden lights (7). The item shown is rated at 60W and will run three lamps comfortably (so the instructions say). You can get higher rated units and run more lamps. The transformer has a built in overload circuit. I did think about running a 12v supply around the workshop for more lamps but decided against it as the cables would have to be very substantial to avoid voltage drop. The instructions for the garden lights mention this in passing and suggest building a garden ring main if you intend to use lots of lamps. The last photo is of a new lamp ready for the drilling machine (8).
Tachometer and Worklight - Shows wiring using a small built in lighting transformer on the WM14 Mill.
Update - 2018
Finally got around to fitting the lamp to the bench drill, similar build but using a slightly shorter gooseneck. I also swapped out the bulbs for the LED version (MR16 12v 4.8w Warm White). The lights run much cooler and you can touch the casing without getting singed fingers. Interestingly the bulbs are happy to run on 12v AC or DC so must have some circuitry built in to cope with this, remains to see how long they last.
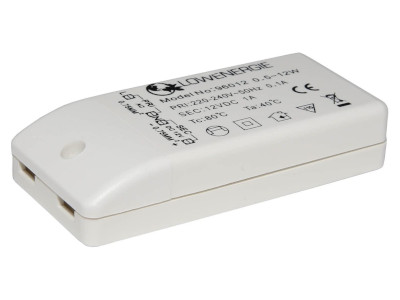
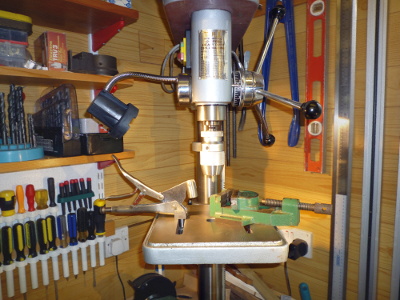
The flange to take the gooseneck is simply bolted to the cast iron body of the drill and the cable run through into the void where I secured a suitable LED driver (9). The lamp has no separate switch it comes on as soon as the drill is powered from the wall socket, illumination is very good (10). Now that Maplins is no longer trading CPC/Farnell supply 300mm and 400mm goosenecks and the mounting flanges quite reasonably priced. The lights however I can′t find a direct replacement for but suitable LED submersible pond lamps are available, just a matter of working out how to fix them to the gooseneck!