Workshop Tour
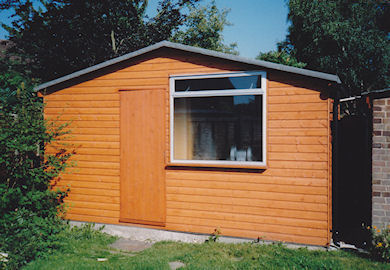
I thought a quick tour of the Journeyman′s Workshop might be in order so that you can see where I spend my time. The workshop is contained in what is basically a large garden shed that I built from scratch over 45 years ago. The original building housed a workshop, a darkroom (remember when photographs used film?) and a home for the garden tools. The construction is all timber (lumber) with a lightweight frame covered in softwood shiplap cladding. I designed the frames around a couple of double glazed windows we had recently removed from the house which came complete with hardwood surrounds. The whole thing sits on a reinforced concrete slab about 4.8m x 2.7m (16′ 0" x 9′ 0"), I cast in a number of fixing studs when pouring the base so the frames could be bolted down securely.
I built the four side frames seperately and added the shiplap to the outside whilst flat on the ground and then with help from my son lifted each frame onto the holding down bolts. The frames screw together at the corners to make the whole thing rigid. The roof is pitched, 2.7m (9′ 0") to the ridge and 2.3m (7′ 6") at the eaves and covered with ply and roofing felt. The inside is lined with printed hardboard (masonite) sheets and there is 50mm (2") of rockwool insulation in the walls and 120mm (4") in the roof. The inside stays fairly cool in the summer and requires only the minimum of heating in the winter.
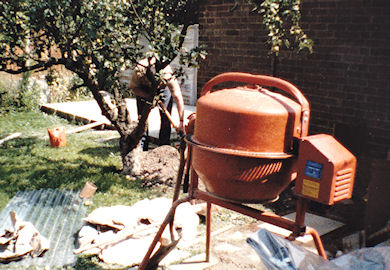
I don′t have many photos of the building process but found a couple in the archives. Photo (1) shows the site just after pouring the base. If you look carefully through the apple tree you can see a much younger me digging a trench for the drains. The apple tree met it′s end shortly afterwards (it never was much good) to make way for the path. Photo (2) shows the workshop just after completion you can just make out the drain I was digging on the right next to the rose bush. The large reclaimed window lets in plenty of light and provides ventilation when needed. When first built there was a partition running front to back on the centre line. The right half, with the window, was my workshop and the left half was split again to make a darkroom for my son at the rear and "potting shed" at the front.
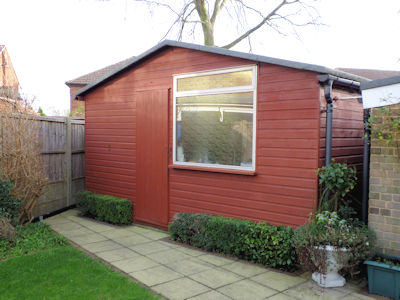
In 2007 with the darkroom no longer required I set about revamping the workshop to use all the available space. The garden tools were ousted to a new shed extension and the partitions removed. The fixtures and fittings in the darkroom were scrapped and the water supply relocated. The original wiring for power and lights was built into the partitions so this needed some re-routing with new sockets and lighting. I try to keep the structure sound by treating the outside every few years, photo (3) taken in the winter of 2015, shows the colour has toned down over the years.
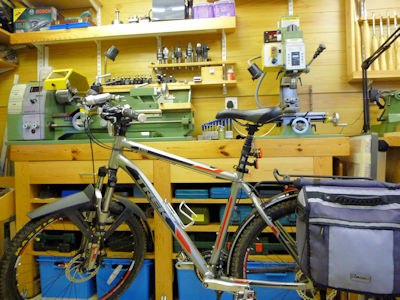
Like many workshops mine is multi-purpose; metalwork, woodwork, home maintenance, general storage and anything else that needs doing. Including storing my bike (4) which gets moved outside when I am in residence! The bike keeps me fit(ish) and the workshop provides the space for routine maintenance.
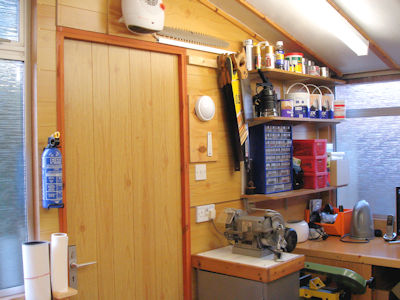
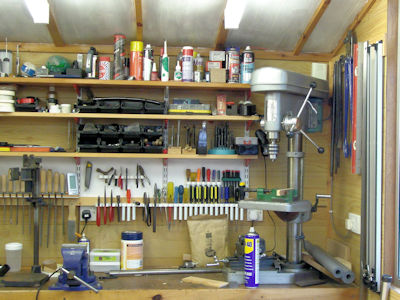
After the revamp lighting is provided by 6 fluorescent light fittings but I still have local lighting for the machines. Heating is by means of a thermostatically controlled fan heater, just above the door (5), set at 1kW this keeps the workshop at around 10°C even on the coldest of days. The cheap Chinese bench grinder is on a steel cupboard which stores the abrasives, solvents, oil and the like. The worksurface in front of the window is over a cupboard built to house a ceramics kiln and the workshop computer. The shelves are home to paint tins and a drawer unit that I keep small nuts and bolts in.
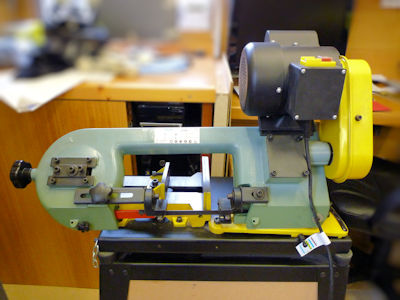
A small Warco CY90 bandsaw (6) lives in the corner and is wheeled out as needed. I have not made any great changes to the bandsaw apart from fitting castors to the stand which I have stiffened up by adding an MDF shelf and back. Hanging up are my hand saws, all of which need sharpening.
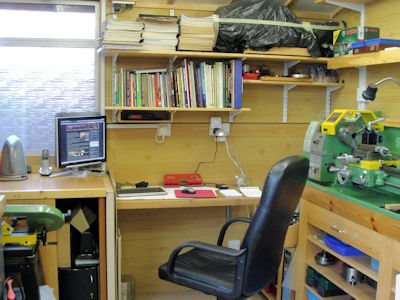
Moving round to the right is my desk area (7), this is fixed to the wall and flaps down if extra room is needed. Above the desk shelves for reference books and magazines. My as yet unfinished model "Loyal Moderator" is stored on the top shelf. The shelves use a cheap spur shelving system from Wickes. I think about 80% of available wall space has this type of shelving fitted. It is easy to put up and suits the lightweight construction of the workshop, it may even impart some strength to the walls. If I were to build the workshop now I would have lined the walls with at least 12mm ply to add strength and to provide fixing for shelves and cupboards.
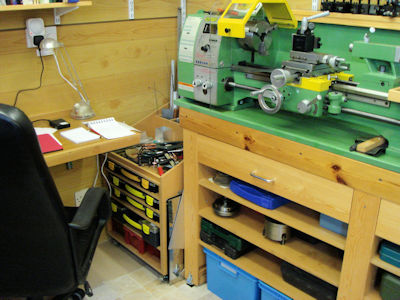
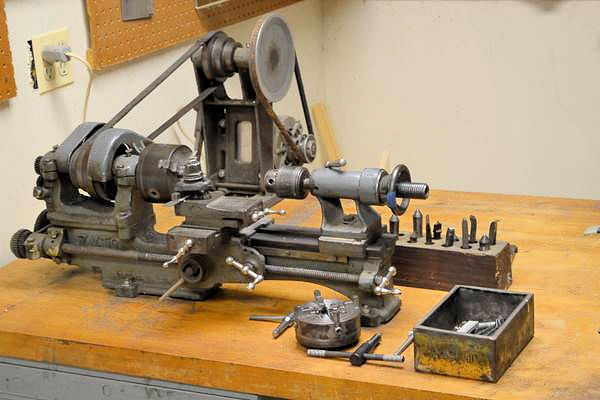
In the corner between the desk and the the lathe (8) is a wheeled storage unit I built. This holds boxes for screws, nails and plumbing fittings with boxes at the bottom for storage of smaller raw materials. The rear of the unit has vertical spaces for storage of longer lengths of bar stock. Storing bars vertically isn′t the best and I may look to rearranging this at some time. The unit is very heavy and I am hoping the castors havn′t flattened too much the next time I need to move it.
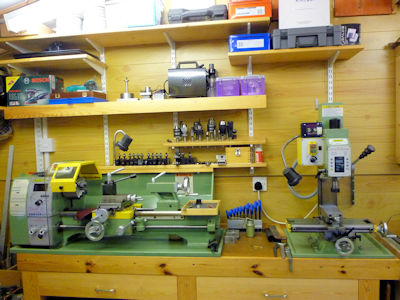
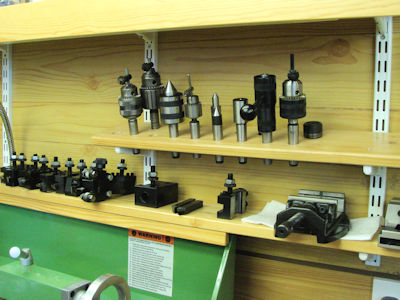
More spur shelving above the lathe (9) provides storage both for lathe tooling and somewhere to fix a fluorescent light fitting directly over the lathe (it is fixed behind the pelmet on the shelf level with the top of the mill). All the light fittings in the workshop have electronic ballast units which work at high frequency so don′t cause strobing problems.
I altered a couple of the spur shelving brackets so that the shelf was angled downwards (10) and used this to keep handy the lathe taper tooling. One shelf rests on the lathe splashback and I keep QCTP holders there. Some people think that storing tooling behind the lathe can be a hazard but to date I have not had any problem. I can′t see why you would want to reach over the lathe when it is running to fetch a tool.
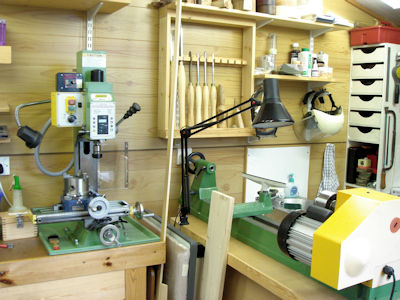
Moving round to the right the milling machine is bench mounted next to the lathe (11). This is quite a convenient position as much of the MT2 tooling and the ER25 collets are used on both machines. The woodworking lathe on its stand is set at 90° to the wall and as you may notice the gap between the machine bench and wood lathe gets used for storage. More spur shelving holds a cabinet for the turning tools and a selection of wood for turning projects.
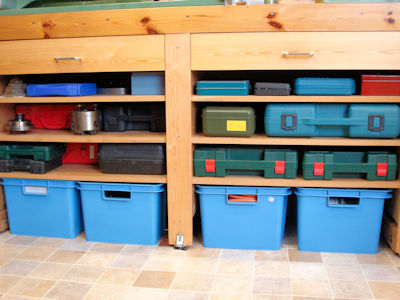
The machine bench (12) is a home made effort some years old as I built it for my original workshop where it supported my first lathe, a Zyto (very similar to this) and then a Myford ML7. The bench top is perforated with various sets of mounting holes. The drawers and shelves I added more recently and the MDF shelves and liners add considerable weight. There are adjustable feet on each of the six legs and the bench is bolted to the floor. The vinyl flooring is only a strip in front of the lathe, makes standing a little more comfortable. The drawers hold tooling for the machines and a set of spanners. The shelves are solid enough to store the lathe chucks and change gears on. The blue boxes hold... well almost anything, there is a lot of "useful one day" stuff in there!
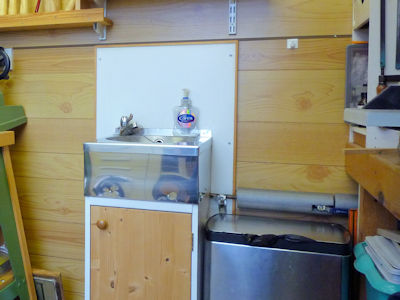
When I revamped the workshop I was going to remove the darkroom water supply but I am now glad I didn′t. The little stainless steel cloakroom sink was the smallest I could find and it has proven to be very useful. If nothing else it enables me to remove the worst oil and grime from hands before returning to the house. Cold water in the winter can be a bit trying, though I have got a kettle if necessary. Paint brush washing, cooling hot metal, cleaning things prior to painting even water for washing the floor, which I must say happens only rarely.
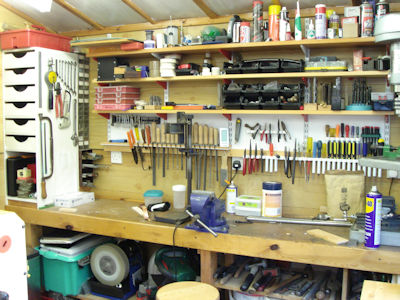
The main fitting bench runs right across one end of the workshop built at the same time as machine bench it is of similar construction. Plenty of storage space below the bench and yet more spur shelving above. My theory is that spur shelving uprights add to the strength of the walls, well it is still standing after 30 odd years. The drawers on the left were made using old wooden filing trays which were being thrown out and hold things like micrometers, calipers, squares etc. There are more small drawers to the rear for nuts and bolts and some storage for short lengths of bar stock lower down which uses lengths of square downpipe. The bench vice is a 4" Record which I have fitted with aluminium jaws. It is able to swivel but I have never used this facility. The vice is fitted over one of the bench legs so you can hammer on it but I have a small anvil if I want to do lots of metal bashing.
The tools hanging on the side of the drawer unit (15) are about all I had when I first started, along with a claw hammer and a saw. I have a few more tools now but you can never have enough! Files are in a rack made by cutting slots in length of 3" x ¾" softwood. Note that all the files have properly fitted handles. The bench in this shot is actually clear enough to stand the belt sander on. It isn′t often that tidy.
The right hand end of the bench is home to my venerable "Tull" Chinese bench drilling machine (16). The drill is 12 speed, heavily built from cast iron with an underpowered motor but it does what I ask of it. I rarely change the speed and if I need to drill the centre of a long workpiece it is too close to the wall. The table however is flat and solid and the rise and fall mechanism works well, it was the first machine I bought for the workshop. The quill is a bit rattly now and I tend to use the mill for most drilling operations.

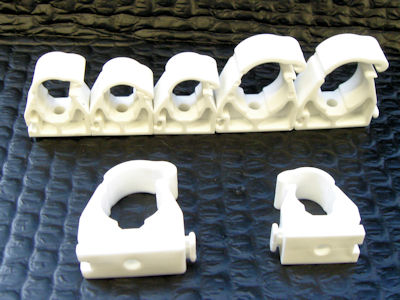
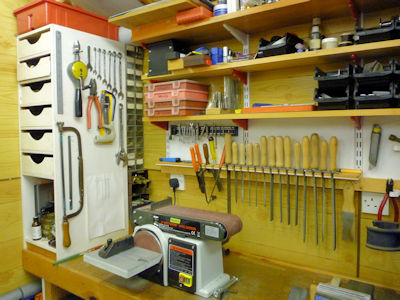
The toolracks (17) are made using pipeclips. These are quite cheap, a bag of 100 from Screwfix is under £10 at the moment. The clips (18) fix together and once screwed to a bit of wood are quite robust. I used two sizes 15mm and 22mm, to stop screwdrivers leaning sideways a short length of plastic pipe can be clipped in place.

I have another bench in front of the window which has a woodworking vice fitted to it (19). This is a small bench and drawer set from Axminster. It came as a "flatpack" self assembly kit and there are loads of parts. The top is quite solid but made of some very strange Chinese wood which is easily damaged. I modified the bench to fit castors, you can see the extra woodwork at the bottom. There is also some more wood under the top to allow the vice to be fitted. Heavy duty lifters on the ends take the weight off the castors so that the bench can be fixed when necessary. I offset the top to one side and the shop-vac lives under the overhang.
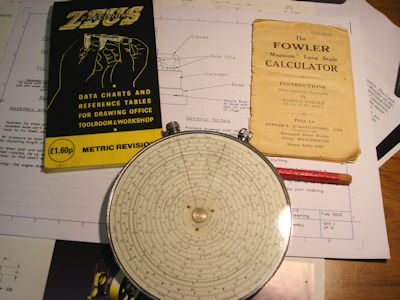
I found this (20) in one of the blue boxes, a Fowler long scale calculator. This dates from the 50's but is one of the many ingenious mechanical calculators around before the advent of the electronic variety. It is actually a circular slide rule and yes I still have the slide rule I used when doing my marine engineering studies rather a lot of years ago. It still works, straight out of the case, no batteries to go flat! No workshop should be without the Zeus data charts, it will cost more than £1.60 though.