Getting Started In Model Engineering
Milling Machines
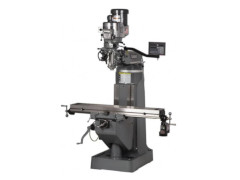
Milling machines in general benefit from being heavy, lots of weight (in the right place) imparts rigidity and rigidity makes for fast metal removal. So it is a good idea to go for something a bit bigger if you have the space. There are roughly speaking three types of milling machine: vertical with a moving head (column mill), vertical with a moving table (knee or turret mill) and horizontal. I would guess that most small workshops make use of the first type which can be bench or stand mounted. The bench mounted vertical mill encompasses the smallest milling machines available but the larger versions are very useful machines in the home workshop. The moving table (raising knee) vertical mills are often floor mounted although some make use of a low cabinet stand. Machines such as the much copied Bridgeport (turret mill) are the backbone of small jobbing workshops around the world. The horizontal milling machine, even a small one, is capable of prodigious metal removal but not quite so adaptable as it's vertical cousin. Just to muddy the waters a bit more there are also universal mills that can be either horizontal or vertical. If you are new to milling machines I have put a bit of a glossary in the data & tables section. Choosing a first milling machine is no easier than choosing the first lathe. Take it slowly, read a lot, make comparison tables, have a clear picture of what you need to do. Remember that whatever size machine you need it will require tooling which is unlikely to come with it and may increase the initial outlay substantially.
Mini Mills
Well if there is a mini lathe then there has to be a mini mill to go with it. There are some very small milling machines available and if your hobby involves small scale work then one of these might be ideal, especially for an "indoor" workshop.
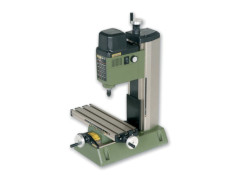
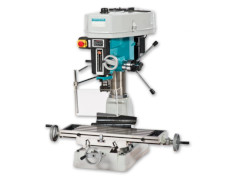
The Proxxon MF70, image (1), is about as small as milling machines get. Made mainly from aluminium and plastic. For work on 00gauge railways and the like it is ideal and may even mill mild steel if you are careful. Designed really for plastics, wood, aluminium and brass has the advantage of a 20,000rpm spindle speed so ideal for use with very small diameter carbide cutters and burrs. Table size is 200 x 70mm with a spindle to nose height of 135mm. The whole thing weighs in at around 7kg. Available from Axminster amongst other suppliers.
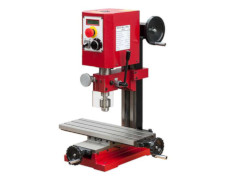
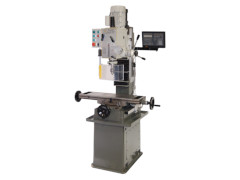
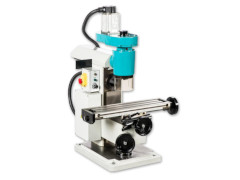
The Sieg SX1LP, image(2) is one of their smaller milling machines and benefits from a brushless motor. With spindle speeds up to 5000rpm. Similarities with the Proxxon stop there though, this machine is an order of magnitude heavier at 50kg with the main components being made from cast iron and whilst not huge can certainly cut real metal. The table is 400 x 145mm and the spindle to nose height is 260mm. I think at present this is only available from ArcEuroTrade.
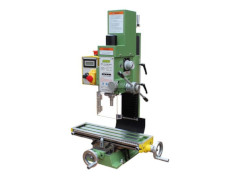
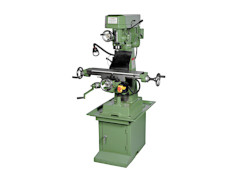
The last of this group (3) is the Weiss WM12 just about the same size as the Sieg but slightly heavier weighing in at 54kg. The table is 400 x 120mm and the spindle nose height 280mm. The motor in this machine is a variable speed DC motor which drives the spindle by gearing in the head, maximum speed is 2000rpm. This is a slightly smaller machine than my own WM14 and supplied by Warco.
Machine Tapers
The small mills above will likely have a built in collet system like the Proxxon or come with an MT2 (Morse Taper) spindle taper. As machines get bigger though you may be offered a choice of spindle taper. This is an important decision as it will affect the cost and availability of any tooling you might need in the future.
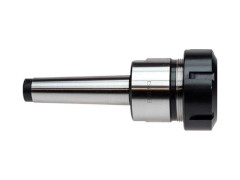
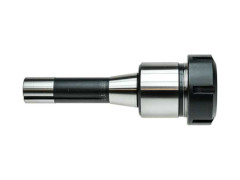
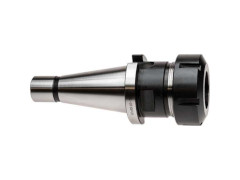
The three images above show an ER40 collet chuck with an integral taper shank. Image (4) is a Morse Taper, MT3, this is quite common on the smaller vertical mills. The MT3 is a self locking taper, meaning it will have to be "persuaded" out of the spindle taper socket either by mallet or captive draw-bar. The standard draw-bar thread for MT3 is M12. Milling chucks should always be used with a draw-bar to prevent loosening with vibration regardless of the taper in use.
The R8 taper shown in (5) was designed by Bridgeport for their milling machines. The taper is non-locking and is keyed to prevent rotation during insertion and removal but it is the taper that transmits torque in use. The internal spindle socket has a location pin which engages the keyway, many users remove the pin as it becomes damaged in use, tooling and collets work happily without the pin. Standard draw-bar thread is 7/16" UNF. One advantage of the R8 system is that a large range of collets, up to 25mm, and even some square ones, are made to fit directly into the mill spindle, this saves considerable headroom and may make something like the ER chuck unnecessary.
Larger machines may well come with ISO or similar tapers, image (6). These are non-locking tapers having a standard slope of 7:24 (≈16° included angle). There are several different systems all using the same angle taper but with different draw-bar threads, ends and flanges so it can get confusing searching out the right thing. There are also several size ranges 30 to 60 but by far the most common is 40, there is a vast range of industrial tooling made with this taper.
- ISO, NT, NMTB, DIN2080 - short parallel section at small end. Equal drive slots.
- CAT, CV, V-Flange, DIN 69871 - no parallel section. Unequal drive slots.
- BT, MAS403, DIN6383 - no parallel section. Equal drive slots.
This video by Mattias Kristiansson throws some light on the subject. The torque for these tapers is transmitted by a pair of dogs that match the slots in the flange. Some of the holders are designed for use with pull studs for CNC automatic tool changers. The studs can be replaced by a draw-bar for a manual machine. A useful web page with information about most taper systems may be found at Tools-n-Gizmos.
So which is the best taper to choose? For the smaller machine you are unlikely to get a choice and MT2 will be almost standard, except perhaps for the miniature machine where there may be a built in collet system. The mid range hobby machine is likely to be offered with a choice of MT3 or R8, here R8 is probably the best choice with plenty of tooling, a good collet system and easy to remove. With larger machines the choice will likely be R8 or an ISO variant. For production work the ISO route is likely the best simply for the availability and range of tooling. If the machine has an auto tool changer then ISO is a must. If you are buying second hand then of course you don′t get a choice as changing the spindle taper isn′t really an option.
Mid Size Milling Machines
There are plenty of machines to choose from that are well suited to the home workshop and will do useful work. Like choosing a lathe, the best way to make a decision is to look at the real thing, wind the handles, do some measuring and if possible use it. Consider carefully the Z-axis height, it is very easy to fill the space between spindle and table with tooling. Check the Y-axis travel to ensure that the spindle can reach both sides of the table. Consider the height of the machine, some have handles at the top of the column, can you reach it when the mill is on your bench? Remember that the mill will need almost twice it′s static width for a working envelope to allow full table travel and some hand room. Compare specifications carefully but remember the figures only tell you what the seller wants you to know. Unlike domestic appliances, where there are plenty of comparison sites, you wont find the same for machine tools. You are pretty much on your own unless you have a friendly expert to hand. Here are just a few examples to whet your appetite.
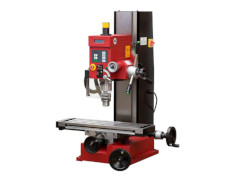
The Sieg SX3 vertical milling machine has been around for a while, image (7) and this is the latest incarnation with belt drive and 1kw brushless motor from ArcEuroTrade. This comes with an R8 spindle taper, 550 x 160mm table and spindle to table height of 380mm. Note that the Z-axis hand-wheel is at the lower right of the base. Speed range 100 to 1750rpm variable. Has a slow speed tapping mode controlled from the quill handle. Weighs in at around the 160kg mark. Sieg make several machines around this size the SX2.7, SX3, SX3.5 and SX4. There are still plenty of the older standard DC motor versions about as well.
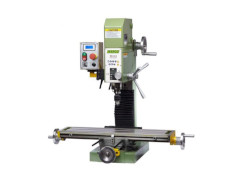
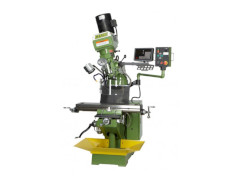
Around the same size is the Weiss WM16B in image (8) from Warco. This only seems to come with an MT3 spindle taper (R8 might be available from another source), has a 1kw brushless motor with belt drive to the spindle. Table is 700 x 180mm and spindle to table is 400mm. Spindle speeds from 100 to 3000rpm variable in two ranges. Weight around 125kg. Again there is a range of similar sized machines and older versions are available.
I don′t think I would particularly recommend the mill/drill shown in image (9) as it is a bit of a dinosaur. This style of machine used to be very popular at one time until the dovetail column mills started to become more common. The largest failing of this style of machine is lack of radial register for the head making it difficult to adjust the head height for machining tall items. That said they are robust and heavy. This machine is from Axminster they don′t give a maker but I suspect it may be made by Rong Fu in Taiwan, they manufacture several similar machines. Spindle taper is 3MT, table 730 x 210mm. Belt driven with 12 speeds from 100 to 2080rpm. Spindle to table height is 475mm, weighing 270kg.
A quick look at some slightly larger larger milling machines. The Super Lux Mill from Chester, image (10), is at the cross-over point between bench mills and floor standing. It is a bit too tall to stand on a normal workbench so is supplied with a low cabinet stand. This is still a column mill with a geared elevating motorised head. Table size is 820 x 240mm, spindle to table height 475mm, spindle taper is R8. 1hp 240v motor driving through a 6 speed gear box with a speed range of 95 to 1600rpm. Weighs 278kg and is 2.1m tall (I assume this includes the stand).
Image (11) shows the Toolco VM26, this is a small turret mill. The head is fixed height although it may be rotated left/right up to 45° and the whole head (ram) may be rotated. Table size is 660 x 152mm, spindle to table height 330mm. Spindle taper is R8, belt driven with 9 speeds from 190 to 2100rpm by a 1.5hp 240v motor. Weighs 262kg including cabinet stand.
Image (12) shows a Warco WM20 turret mill. This is basically a smallish turret mill along the lines of a Bridgeport made, I assume, by Weiss. This is a floor standing machine weighing 785kg so you will need proper foundations for this one. Table is 910 x 226mm and spindle to table is 365mm. The machine has an inverter drive with a 1.5hp motor speed range from 100 to 2800rpm. Spindle taper is R8. The overarm slides in the Y-axis and the head can rotate left/right up to 90°.
Image (13) shows a Bridgeport Series 1 "9BRM" turret milling machine with a 36" x 9" table with a model M head which is only ½hp. There are many versions of this machine with different sized tables, different heads and an array of available attachments. For more information look at lathes.co.uk which is where I liberated the image from. Bridgeport, like many machine tool manufactures, has changed owner several times and is now part of Hardinge and the manual milling machine is no longer made. Used machines come on the market regularly and are still widely used in industry. If you need something this big then a clean used machine is a good buy but check carefully a lot of them will have had a hard life. There are also plenty of very similar machines by other manufactures available new or used. Don′t forget that these machines weigh over 1tonne and the later models with large tables considerably more so transport costs and siting need careful consideration.
By way of a change image (14) shows a small universal milling machine, the Sieg SU1, this one is from Axminster. The switch from vertical to horizontal is achieved by having an independent power unit and spindle. This is either plugged into the front of the overarm for vertical use or moved to the rear to engage the horizontal spindle. Unlike most small mills this one has a rising table with a fixed head. A 500w brushless variable speed motor supplies the power with a speed range from 200 to 2000rpm. The table is 460 x 120mm with a spindle to table height of 150mm. The spindle taper is MT3. There is a review of this machine in Model Engineer December 2014.
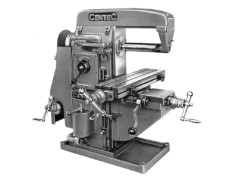
A horizontal mill would probably not be a number one choice for a first mill but they are without doubt capable of serious work. The Centec 2A mill shown (15) is at the smaller end of the horizontal mill range and this model or the later 2B version often become available through dealers or at auction. The Centec is in fact convertible to a vertical mill by the addition of another head and a re-arrangement of the spindle drive. The conversion does not leave a lot of table to spindle height so some users incorporate an additional riser block between the column and overarm. The table size is quite small at around 400 x 108mm and the distance from arbor centre to table is 168mm. This model requires a cabinet stand or can be bench mounted. The 2A weighs only about 165kg and the newer larger 2B about 225kg. The vertical head will add quite a bit more weight. A thread on the Model Engineer Forum looks at the Centec and has some images of the vertical head and raising block.
Milling Machine Accessories
Any milling machine is going to need some extra 'bits' before you can do any work. First and foremost you will need a method of holding the workpiece firmly and second you will need something to cut it with. A quick look at work holding first.
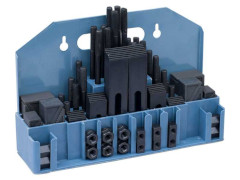
With the usual advice against buying in sets, image (16) shows a clamping kit from ArcEuroTrade, you may not use all the bits but most will come into play one day. You can of course easily make most of the bits you need once you have a few starters. The most important item is T-nuts make sure these are a good fit for the table T-slot, a badly fitting T-nut can damage the table if tightened hard. Another thing that can cause damage is T-nuts with a through thread allowing studs to tighten against the bottom of the slot. The T-nut thread should only go part way through, if making your own use just the taper tap and the bottom threads won′t be full depth. Don′t overdo the tightening, when in doubt add another clamp. Another 'no-no' is using ordinary hex head bolts in the T-slots. Clamps can be made from plain bar with suitable holes or slots machined. In fact making clamping items is a good way to get to know your milling machine.
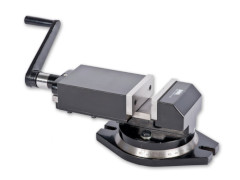
Without doubt the most used accessory for the milling machine is a machine vice. Mine stays pretty well permanently on the table. There are plenty of different types around but most common is something like that shown at (17), this particular model is from Axminster. When buying make sure that there is adjustment to stop the moving jaw lifting when tightened. In the image you can just make out three bolts under the sliding jaw that can adjust a gib strip. There are vices with a built in wedge action that prevent lift, Kurt for example, or the so called 'screwless' vice which is useful for smaller jobs. Make sure the vice is a suitable size for the mill table, small is fine but too big reduces Z height and can introduce other problems. The vice shown has a detachable swivel base which might be useful but I have never used mine and it lives on the shelf under the mill. One of the first jobs to learn is 'tramming' the vice in so that the fixed jaw is parallel to the axis, for this you will need a DTI (dial test indicator). The vice is often aligned with the X-axis but can be set however you need it oriented on the table. If you have a large mill table the vice can be mounted at one end of the table leaving the other end free for direct clamping or a rotary table perhaps.
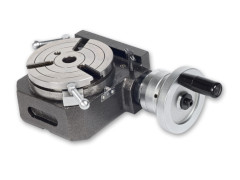
The rotary table is useful for example, drilling a number of holes on a circle or perhaps milling a curved slot. Not the first accessory to buy for your mill but worth having. The rotary table shown in (18) is from Axminster 110mm diameter with three T-slots. You can find similar sized tables with four slots which is possibly more user friendly. The table can be used as shown or mounted vertically. You can get dividing plates and suitable tailstock for this and most tables. The dividing plates allow for accurate division for making items like gearwheels and the tailstock is needed so that an arbor can be mounted horizontally to carry the gear. It is also useful to have a chuck for the rotary table slight drawback to the chuck is that it uses valuable Z height.
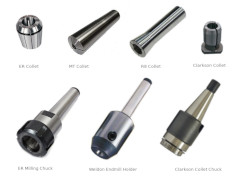
Now that the workpiece is fixed to the table we just need a cutting tool and something to hold it in. For the milling machine the cutting tool is held, pretty well universally, in some form of collet. Image (19) shows a selection of different collets but for the smaller machine the ER series of collets and chucks is probably most useful. An ER collet is split from both ends allowing a much greater range of sizes to be held securely. The larger ER collets have a range of 1mm and the smaller ones 0.5mm. There are around eight ranges of ER collets from ER8 to ER50 the number denotes the largest diameter of the collet not the bore. The collets in each range are not interchangeable with those from another range so a bit of thought as to the most useful size to go for. In the home workshop ER25 (1mm - 16mm) and ER32 (2mm - 20mm) are likely candidates. The ER collet chuck will have a suitable arbor at one end MT2, MT3, R8 or ISO with a drawbar thread. The other end has a large collet closing nut commonly utilising a C-spanner to close it. ER collets require plenty of torque to tighten and hold the milling cutter. There are ball-bearing closing nuts which make tightening a bit easier. ER collets can also be used for work holding in the lathe utilizing a backplate fitted chuck and work holding on the mill table using collet blocks.
Image (19) also shows some 'direct fit' collets, these fit into the spindle of the machine without the need for any chuck. For the smaller machine with MT2 or MT3 spindle taper there are MT collets. Each collet is threaded for a draw-bar and fits only one size of cutter. The advantage of this style of collet is that they save the Z-axis height used by a chuck and of course being in the spindle there is an improvement in rigidity. If your mill has an R8 spindle taper then collets are ideal, they also only fit one size of cutter but the space saving and extra rigidity probably outweigh the disadvantages of having more collets.
The last collet in image (19) is for a Clarkson Autolock chuck. You are unlikely to need one of these for the home workshop as price probably outweighs usefulness. The Clarkson chuck works only with threaded shank cutters and is designed to automatically tighten if the cutter slips. The collets fit one size of cutter only. Lastly in image (19) is the Weldon end mill holder. This is designed for tooling with a machined flat, not so much a chuck but simply an accurately sized hole with a grub-screw fitted to hold the cutter, again one holder for each size cutter shank.
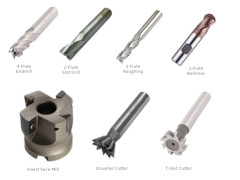
The most used cutter for the milling machine is a 4-flute end mill as seen in image (20). A 4-flute end mill will, as the name suggests, cut on both the sides and end although cannot be used for a deep plunge cut as the cutting edges do not go to the centre. More useful in that respect is the 2-flute slot drill which can be fed straight into the work and will cut a hole before being moved sideways. The slot drill is useful for creating pockets in the workpiece. Slot drills and end mills have different speed and feed requirements and if you find other multi-flute cutters adjust feed and speed rates accordingly. There are centre cutting 4-flute end mills but these are not as common or as cheap as the non-centre cutting variety. End mills tend to be more rigid than slot drills and slightly more forgiving of over-enthusiastic feed rates. The end mill shown has a plain shank and the slot drill is threaded for a Clarkson style chuck but threaded milling cutters can be held without problems in an ER, MT or R8 collet.
The top row of image (20) also shows a 3-flute roughing cutter, this has teeth along the cutting edges to break up the swarf into smaller particles to clear the cut quickly, especially useful with flood coolant to wash the chips away. 3-flute end mills are also available without the teeth and are a useful compromise between end mill and slot drill. 3-flute end mills are usually centre cutting so you may not need anything else if you can obtain the right sizes. The last image on the top row shows a 2-flute bull-nose cutter, note that the shank has a flat to suit a Weldon holder but can equally well be held in other collets. Useful for adding detail such as fillets, not however designed to move large amounts of metal. There are other shaped cutters such as 45° for chamfering or corner rounding cutters with various radius ends.
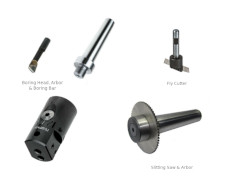
The last image (21) shows a boring head with it′s arbor and a small boring bar. The boring head is useful for cutting large diameter holes and for large concave edges or surfaces. In use a suitable boring bar is set in one of the holes in the sliding part of the head. The diameter of cut can be adjusted initially by setting the boring bar in place with the clamping screws and then by using the micrometer engraved dial to move the slide out. Quite often the boring head will be supplied with several different length boring bars to enable quite large radius′ to be cut. The bar can be mounted in the side hole for very large cuts and in this position can also function as a fly cutter.
The fly cutter in (21) is used for machining large flat surfaces, if well adjusted and sharp quite acceptable finishes can be obtained. In use the fly cutter is quicker than multiple passes with an end mill best with an automatic feed to obtain the ideal surface. Another useful cutter for the mill is the slitting saw. This is basically just a small circular saw held in a suitable arbor. Slitting saws are available with different bore sizes, many different diameters and with many different tooth counts. A fine thin saw can be used for putting slots in specialist screws or a coarse blade may be used to cut a long deep slot. Course blades have better swarf clearance if cutting deep slots, ideal with flood coolant.
Milling machines and milling is rather a broad topic and this page has only just scratched the surface, hopefully enough to give you some good ideas and perhaps shine a little light on some of the pitfalls. Industry has to a certain extent moved away from discrete milling machines and fully automatic machining centres are now the order of the day. I have not mentioned CNC machines for the home workshop but these are not out of the question if your interests lie in this direction. There are small CNC machines available for the home workshop, Sieg make a number based on their manual machines. In the used machine market Denford and Boxford machines are fairly common having been much used in education. Boxford, Emco, Wabeco, Syil and Tormach all make small CNC machines suitable for home workshop use. CNC tends to be expensive, I doubt you will get much under £7000.00 but you could of course convert a manual machine there are plenty of conversions detailed on the various CNC forums.
Further Reading
- Suppliers
- ArcEuroTrade - Sieg Milling Machines
- Amadeal - Milling Machines
- Chester - Milling Machines
- Axminster - Milling Machines
- Proxxon - Milling Machines & Lathes
- Warco - Milling Machines
- Rondean Machinery - Used Machinery dealer
- G&M Tools - Used Machinery Dealer Websites
- Journeyman′s Workshop - Lathe & Mill Glossary
- Wikipedia - Milling Machines
- MyCNCUK - CNC forum with self builds and conversions.
- Milling For Beginners - this is a thread on the Model Engineer Forum, it supports a series in Model Engineers Workshop magazine. Books
- The Milling Machine - Harold Hall a Workshop Practice Series book
- The Milling Machine - For Home Machinists, another Harold Hall book
- Milling - by David Clarke, a Crowood Metalworkers Guide
- CNC Milling - In The Workshop by Marcus Bowman
- Milling For Beginners - by Jason Ballamy, a new book (2020) based on a series in Model Engineers Workshop magazine
