Braved Saturday′s somewhat inclement weather to drive the 110 miles to visit the Bristol Model Engineering & Model Making Exhibition. The exhibition, as in previous years, takes over most of the available space at the Thornbury Leisure Centre. Slightly different layout this year as the Centre was using one of the smaller rooms but plenty of models for visitors to enjoy and enough traders to supply all those engineering necessities and lighten your wallet. By my reckoning about 40 trade stands, 50 club stands and some 40 private exhibitors helped fill the display stands.
1. Bristol Society Stand – GWR Rules
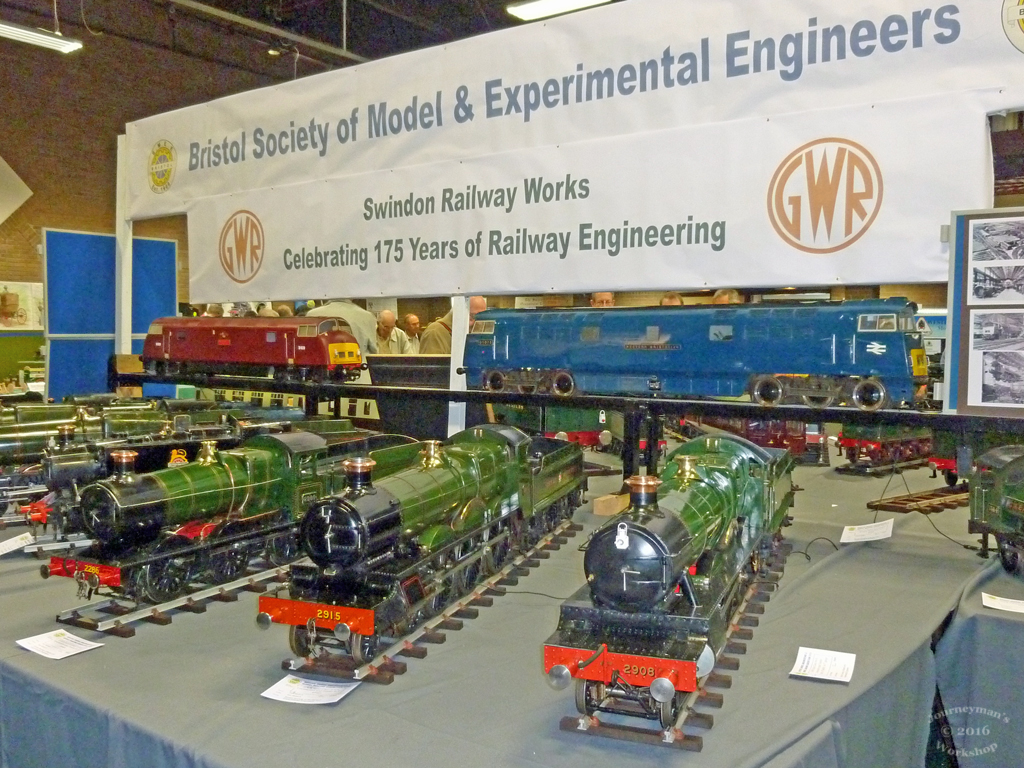
GWR Swindon works celebrates it′s 175th year and the BSMEE stand acknowledges this with a fine display of GWR locos. The Society also promoted a theme of “model making” for the show and this is reflected in the change of name for the event, which the observant will have noticed, I didn′t until I read the exhibition guide! Some of the GWR locos on display (1), two Saints nearest the camera 2908 and 2915 with 2286 a 0-6-0 Collet design tender loco on the left. Click On Photos For A Larger Image.
2. BSMEE Stand Locos
3. Bristol Society Stand
4. Hall 1 from balcony
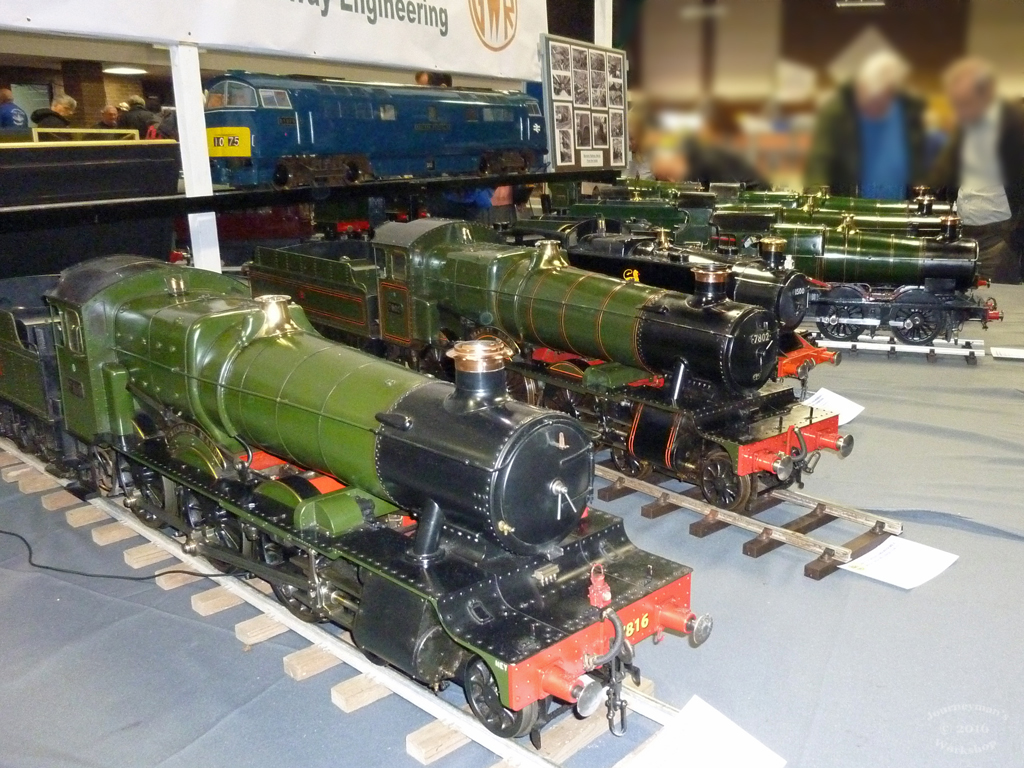
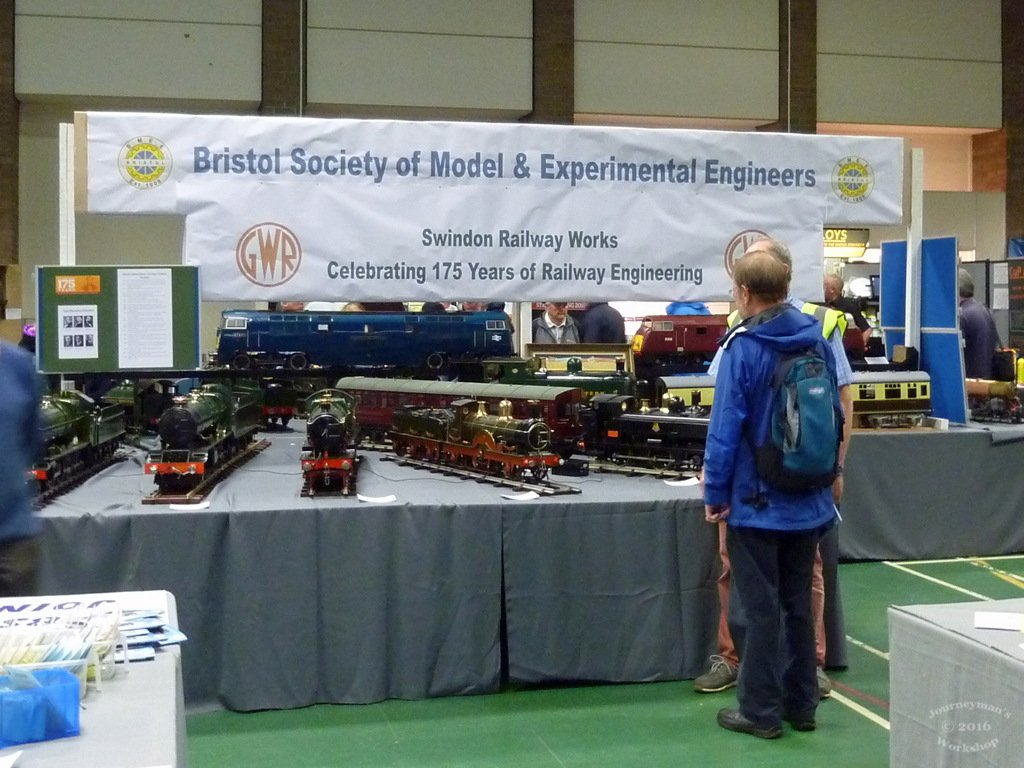
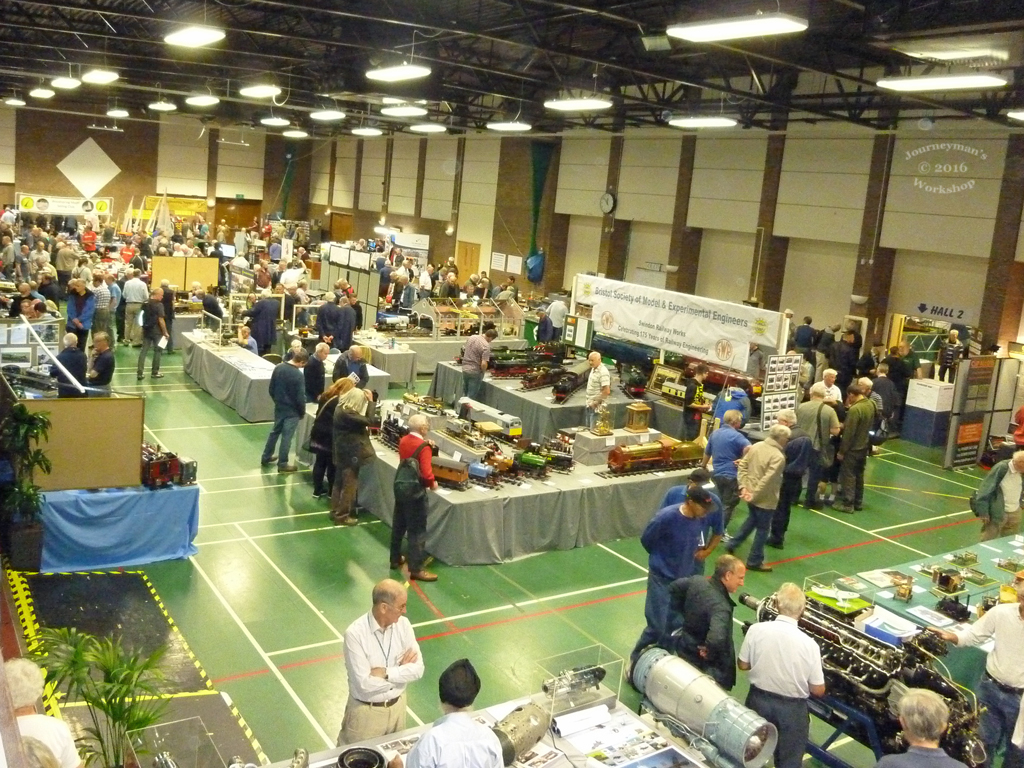
At the opposite end to the Saints are; (2) Frilsham Manor 7816 and Bradley Manor 7802. A general view of the BSMEE stand (3) and a view from the balcony (4) which shows how quiet it was, I think the weather and the Olympics conspired to keep potential visitors at home, apparently Friday was a lot busier. As last year I have selected just a few of the hundreds of exhibits on display.
I recently spent an interesting few hours visiting the Magyar Vasúttörténeti Park. This is a large open air railway museum in Budapest, a bit away from the usual tourist hotspots but still quite easy to reach with a short walk from bus or tram stop. There is a direct railway link at weekends running from Nyugati Station. Opened in 2000 the museum covers some 7 hectares (17 acres) on the site of the former MÁV (Hungarian State Railways) Budapest North Depot. There are more than 50 locomotives in various states of preservation along with a huge selection of rolling stock. Some of the exhibits run at weekends and holidays and you can even get to drive one although I think you have to book in advance for this. Not everything is open every day and a weekend visit seems to be the best choice but it is popular locally and quite busy.
Freight Locomotive 1026 – built 1882
The locomotives are without doubt the main attraction and for any European Railway Enthusiast a day will likely not be enough time! First up is MÁV 1026 (pictured above) a class 341 (341,012) freight locomotive build by Wöhlert Berlin in 1882, the information given for the loco shows the wheel arrangement as C-n2. This had me a bit confused until a quick web search revealed that this is the European UIC class and apparently means it is an 0-6-0, 2 cylinder loco using saturated steam. 1026 spent a good deal of it’s working life (1959 to 1985) in a sugar factory in Sárvár. Like many locomotives the number and class has changed several times through it’s lifetime.
Well, this is the first post of 2016 so you may well think that I have been rather idle. You would probably be right but I have been doing a lot of reading about the benefits and mechanics of CNC. I was using the mill and winding the handle for what seemed like hours and thought it would be easier if this was motorised. So I read up on power feeds and that let on to full automation. Whilst there would be a serious learning curve, CNC would without doubt be useful and in the long run quicker.
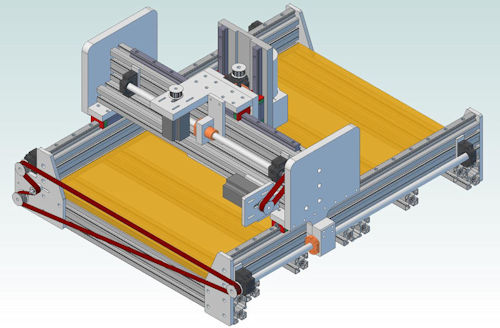
Router Using Aluminium Profile Frame
There are several routes to take: Buy a new CNC mill, Tormach or similar; Convert my existing mill; Get a new mill and convert that or go down the self build router avenue. I quickly decided that a new CNC mill was way out of budget and was initially keen on the router idea and spent some time designing something that coud be built within the limits of my current equipment. Most of the time was taken with remembering how Geomagic Design worked as I don’t use it that often. Converting the current mill I ruled out as it is I think too small and besides I would probably need a mill to modify the mill. Thoughts at present are focussed on buying a new larger mill and converting that. This of course is a decision that might take years!
I have also been tweaking the website a bit. Mainly removing redundant CSS from the stylesheet and altering the menu somewhat. Hopefully I havn’t broken anything. I have also added more links and fixed or removed a few broken ones.
Not put anything here for a bit so I thought I would just show what I was doing this morning. Apart from the workshop hobbies I also cycle a bit, nothing too strenuous you understand but I try to get in 20 or 30 miles a week. This is mainly in an effort to keep the weight down and keep semi-fit. A bit of a losing battle to be honest.
However the last few rides the chain was jumping occasionally. Checking the chain is easy just measure from one pin against a rule and the pin at the 12″ mark should line up. If the pin is more than 1/16″ away the chain needs replacing soon. Mine was a good 1/8″ longer so should have been replaced some time ago. (Although most fixings on modern bikes are metric a good few parts still use imperial measurements chains being and example with ½″ links.) Chains don′t really stretch but the rollers and pins wear and introduce slack. I should have checked more often as I ride mainly off-road and the chain is always covered in dust and grit which with water and oil make a nice grinding paste.
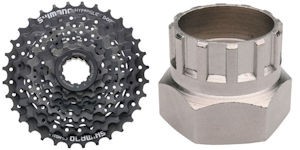
Cassette & removal tool
I fitted a new chain and found that the chain was jumping and skipping all the time, further checking revealed that the rear cassette appeared to be worn, at least that′s what it looks like to me. The teeth on the gears looked to have worn on one side. So I ordered a replacement Shimano 8-speed cassette. Bike repairs are quite easy but you need a few specialist tools, I bought a splined cassette lockring removal tool with the cassette for £4.99 but I forgot to get a chain whip (that′s what the cycling fraternity call them I would probably call it a chain wrench!). You can buy them from about £5 upto a ridiculous £40 if you want the real Shimano one! The tool stops the cassette turning while you undo the lockring. I could probably come up with an alternative but the right tool makes the job a little easier.
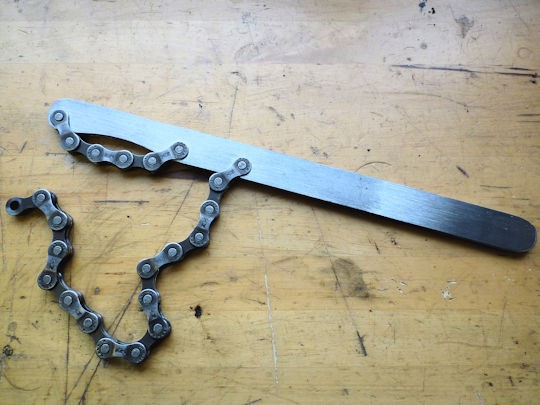
My Version of a Chain Whip
I looked at the picture in my favoured on-line bike store and thought it would be an easy thing to make. So I found a suitable bit of flat bar and set to. I used the old chain and simply drilled holes just big enough to take the chain rivets, these are a press fit in the chain plates so once pressed back in hold the chain in place. All the shaping I did on the new belt sander, only took a few minutes. Now waiting for the new cassette to arrive in the post to see whether the tool works.
I must remember to keep a closer watch on the chain and make sure that it is clean. I have one of those on-bike chain cleaners, rotating brushes in a plastic tank, that works quite well but the new chain has a removable link so I could take it off and dunk it in the ultrasonic cleaner. I am hoping that the other end of the drive, the chainring, is OK. It looks alright to me and I hope it is because that is a bit pricey to replace as it comes with the pedal cranks as far as I can make out. The joys of cycling!!
Update: the parts turned up the day after I posted. Nice smooth job replacing the cassette, took about 10 minutes, so much easier when you have the right tools! Pleased to report that everything works smoothly, no skipping or jumping, just need to fine tune the gear changes.
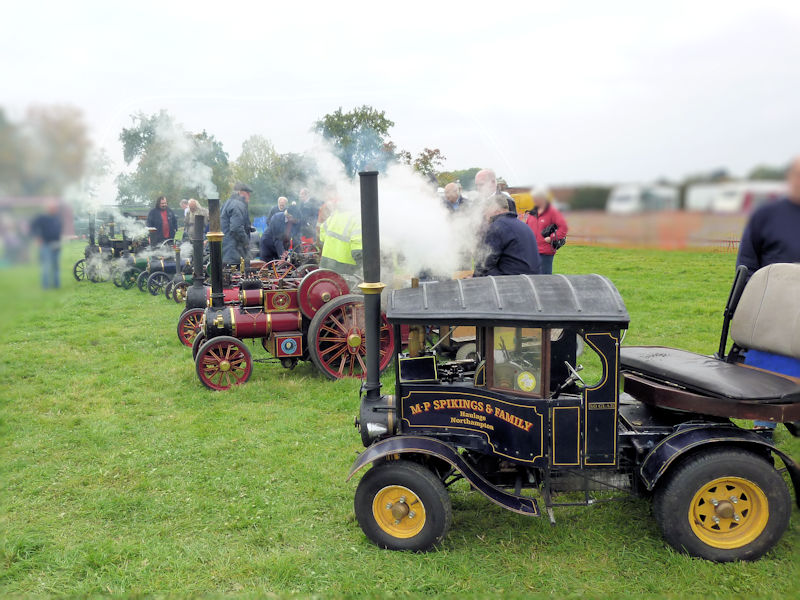
The Fosse Way Steamers
The Midlands Model Engineering Exhibition has been a regular event on the calendar for nearly 40 years and I went to this years show on Friday. The journey was uneventful and once off the motorway quite a pleasant drive through the Warwickshire countryside. The weather was cloudy but dry, a good thing as some of the exhibits are outside including the Fosse Way Steamers (pictured), the Gas Turbine Builders Association and the South West Truckers who seemed a bit lonely in a corner by themselves.
Back inside there were some 50 trade stands and an almost equal number of club stands with 4 large Competition and display stands rounding things off. I have to report a severely dented wallet due to overindulging at some of the well stocked trade stands, note to self – buy less tools! There is plenty of catering at the show with a couple of outside stands and the inside mezzanine restaurant. Over the four days there are a number of free lectures covering such varied subjects as Hobbing Gears, Silver Soldering, Sheet Metalwork, Steaming Model Boats and Foundry-work to name but a few.
The following photos show just a few of the thousands of items on display. No special reason for the choices other than I thought they looked good at the time. Click on the image for a larger version.
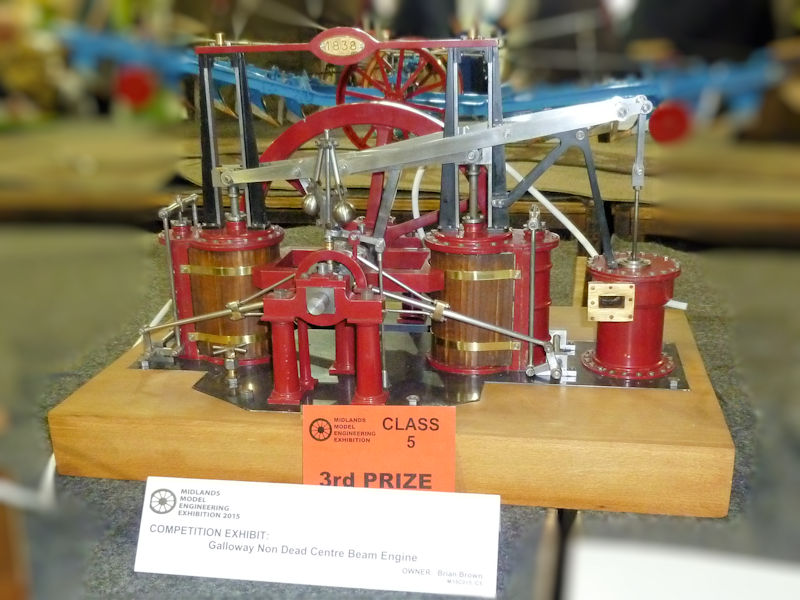
Galloway’s Engine
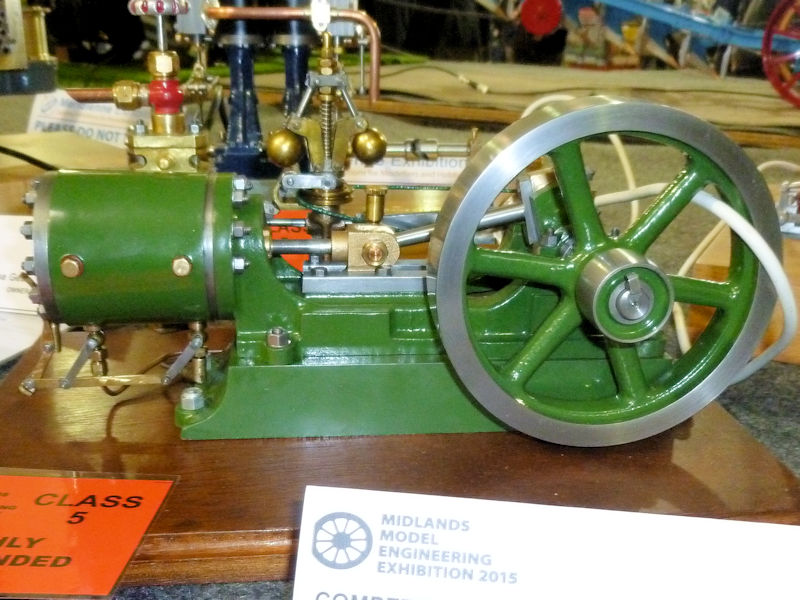
Stuart No.9 Engine
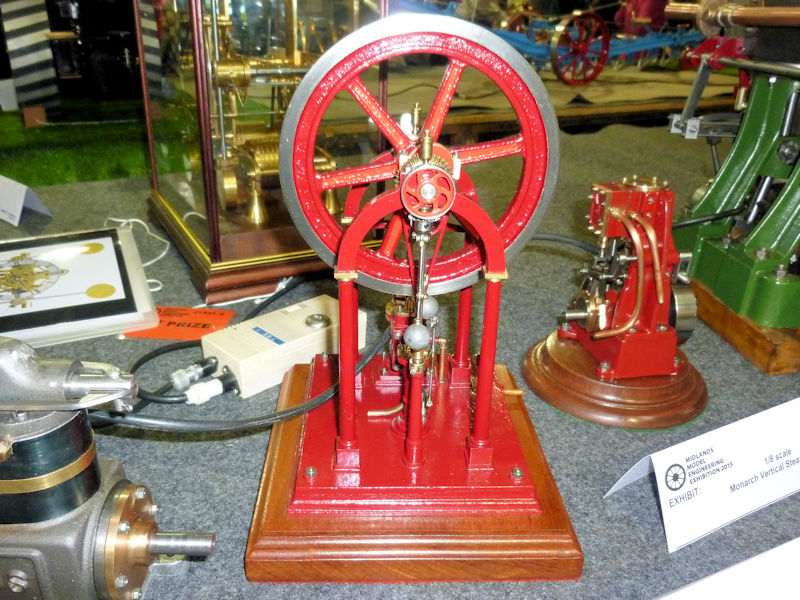
Georgina Overcrank Engine
The three stationary engines were all on the competition stand. The first is a model of Galloway’s non-dead-centre beam engine by Brian Brown which claimed a 3rd prize in its class. The Stuart No.9 engine was “highly commended” and the last engine is I think a Georgina over-crank engine but I missed the label and can’t credit the builder. There were a good number of small stationary engine models at the show many based on castings from the likes of Stuart’s and Brunel Steam Models. I am still working up to completing my Stuart Victoria.
Continue reading “Midlands MEX 2015”
I have seen a number of articles where enterprising mill owners have fitted LED lighting to improve workspace visibility. Often these utilise LED ring lights that are intended for automotive use and a smaller number using flat panels also used as replacements inside vehicles. I couldn′t find a suitable ring light but came across some very cheap LED flat panel lights on Amazon. I ordered a few to play with and at £1.25 each including postage from Hong Kong it wouldn′t be much of a loss even if I couldn′t make something useful.
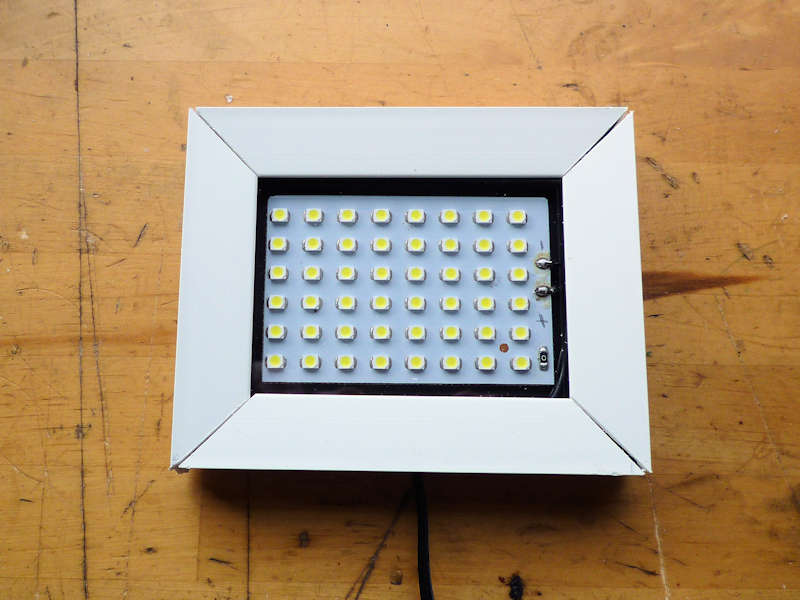
I used bits and pieces that I had in the workshop to make a suitable cover and frame to protect the panel but you could probably just cover it in clear tape to provide a bit of protection. The panels come with a foam sticky pad on the back so they can be fixed to any flat surface. Unfortunately there is no such surface on the mill where I wanted to put the light, just a large recess on the underside of the head. I made the panel to be a tight fit into this recess. A small piece of 6mm clear polycarbonate sheet made the front cover with a similarly sized bit of styrene sheet for the back. The frame was from some left over plastic soffit trim but any U shaped plastic moulding would do
LED panel light
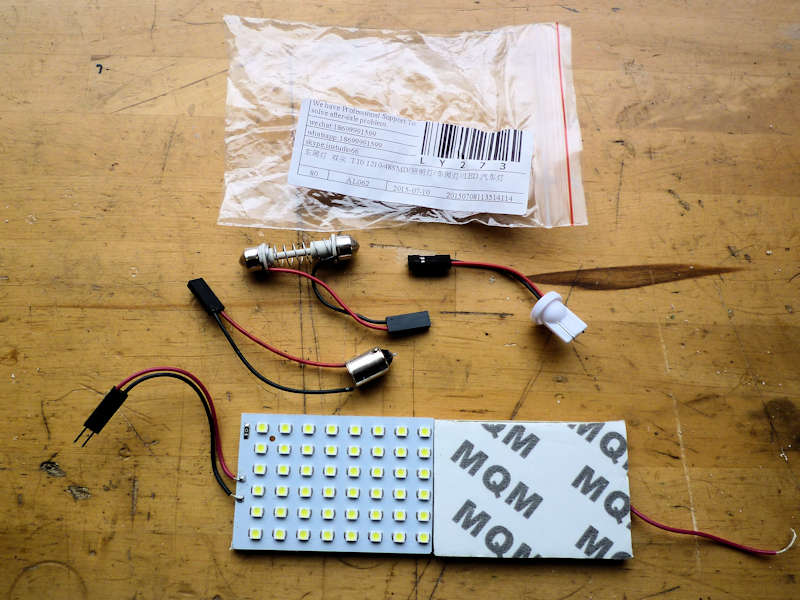
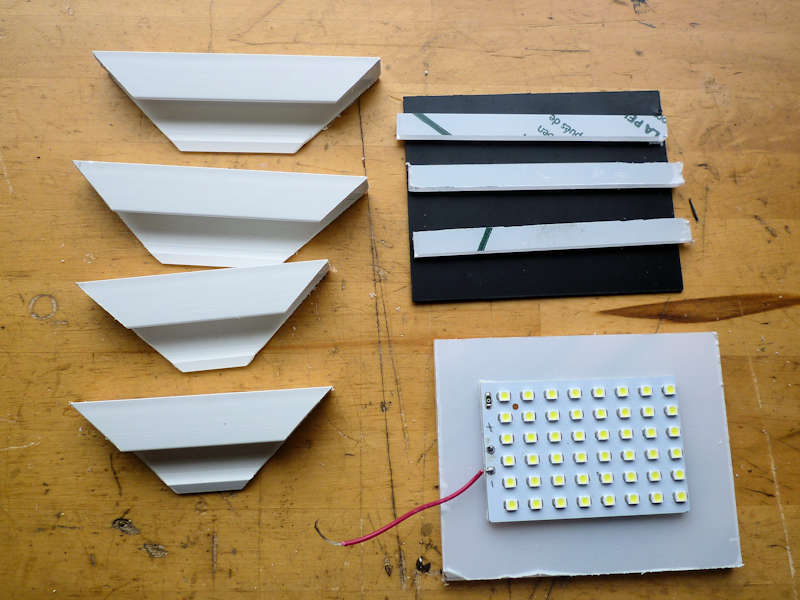
Parts for the light
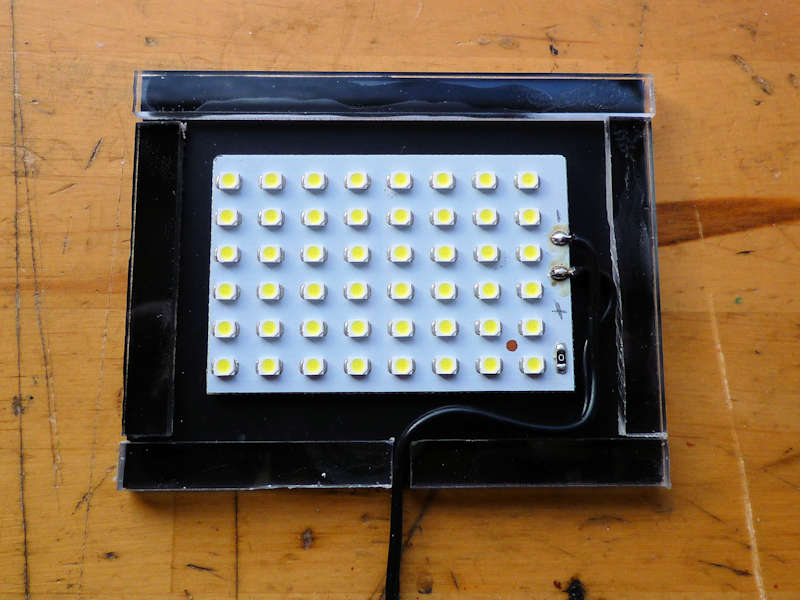
LED On Back Panel
The panels come with a selection of “ends” to suit various vehicle lamp styles, these were not needed as I soldered the power lead directly to the board. Just to really confuse me the original red wire was the negative and the black positive, fortunately the boards seem to have a degree of protection built in! The parts are simply the black styrene back the clear polycarbonate front (it still has the protective paper on in the photo) some spacers also from polycarbonate and the frame. I cut the frame just using a tenon saw and a mitre box so they don′t join up too well. Basically just stick the spacers round the edge of the back sheet leaving a gap for the wire, stick the LED panel in the middle. The frame just clips on and holds everything together. Drill a hole in the edge of one of the frame pieces and thread the power lead through it before soldering the supply to the board.
The finished LED light
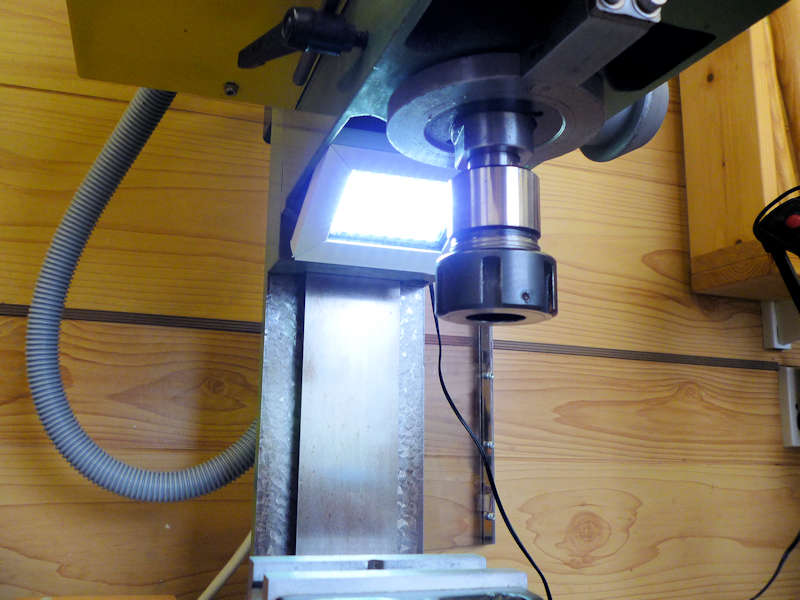
Light in place on the mill
With a bit of adjustment to the width of the light it was a tight fit in the recess under the mill head and at the moment it is just wedged in. It may need some better fixing method if the vibration works it loose. The power is from a 12v plug in supply (Wall Wart) it needs to be DC so I couldn′t use the existing 12v light supply. As can be seen it gives quite a bright light, it is supposed to be warm white but it′s definitely on the blue side.