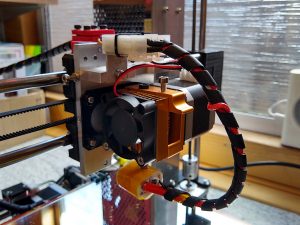
Like many this year I have been “mainly staying at home”. As you can tell from the sparsity of posts I have not been doing very much either, a bit of exercise on the bike a couple of times a week, pottering in the garden and tinkering in the workshop. The workshop tinkering was partly targetted at rejuvenating my old 3D printer which has not seen much use recently partly down to a loose print-head. I resolved to fix this by making a new aluminium backplate to get rid of the plastic frame that held the print-head in place. Whilst the printer was in bits I also decided to fit cable chains and “improve” the wiring to make the hot end easier to maintain. The outcome was only partially successful.

The aluminium backplate worked and held the print-head to the X-carriage securely making use of a ready made steel angle bracket from another make of printer. The wiring mod worked by inserting Molex connectors between the hot-end and the main wiring loom from the print-head assembly. Cable chains were a failure the cables not being heavy enough or flexible enough to make them work as intended.
One of the unforeseen problems was that having removed the build plate fans, printing anything small or with small details wouldn’t work. I was going to print new housings for the fans to screw to the sides of the new backplate this proved to be difficult. I am sure I would have got there eventually but being somewhat impatient I opted for a different solution. Buy a new printer!
A New 3D Printer

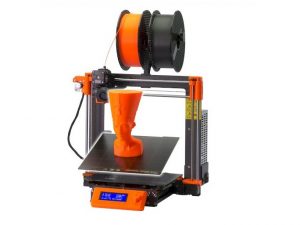
I spent some time researching which printer to buy, not an easy choice. You can pretty much pay anywhere between a couple of hundred to a few thousand pounds for a smallish 3D printer but within my price bracket the Prusa i3 Mk3S consistently had good reviews and I opted for this rather than one of the many short lived strangely named Chinese offerings. At first glance the new printer looks very similar to the old but there are many differences and improvements from old to new.
I opted for the kit version of the printer, it is quite a bit cheaper than the fully assembled one and the kit gives you plenty of insight into how the printer works for future maintenance jobs. I was going to do a write up of the build but there are so many versions on-line including some excellent videos that I decided against it. Not only that, the build manual is so good it really doesn’t need any help. Assembly is quite straightforward just read the manual carefully, and eat the Gummy Bears (Gummibär) as directed. The most difficult part is putting the print head assembly together. The printed parts are made in Prusa’s 500+ printer farm, which uses the same model printer, from PETG. The finish and accuracy of these parts is very good and the files to print replacements are all included on the SD card. The supplied hardware is also of good quality including, at least on mine, Misumi linear bearings. Interestingly as I was writing this Prusa announced an upgrade to the printer, the latest version is now the i3 Mk3S+. Also available (January 2021) is an upgrade to v2.3 of the PrusaSlicer software which makes a few useful changes
Continue reading “3D Printing in Lockdown”