This is a modification I should have made years ago. At long last I have relegated the spanner to the drawer with it’s companions.
I have detailed how to modify the lathe tailstock to get rid of the old nut and bolt and replace it with a lever and cam – much better. This mod involves milling a pocket and drilling holes in the tailstock, so probably not something to do if the lathe is still under warranty. Of course lucky owners of the latest model WM250 already have this as standard. I have included some drawings which of are based on my lathe but could be easily adapted to other similar Chinese lathes, probably even the multitude of mini-lathes out there.
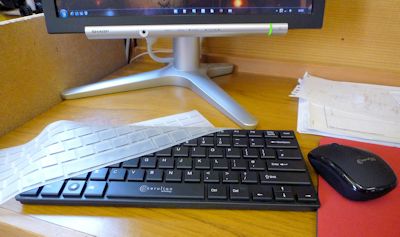
Whilst tidying up I moved the computer and managed to break the wireless dongle for the keyboard and mouse. I only have a small fold down desk in the workshop and a full size keyboard covers nearly all of it. I found a replacement mini keyboard and mouse set from Maplins – Cerulian Mini Deskset ref:N69JX.
Cerulian Mini deskset
This deskset comes with a mini dongle that only sticks out about 6mm so I shouldn’t be able to snap it off like the old one! The keyboard has quite a nice action and takes up very little desk space so should be fine for the small amount of use it will get in the workshop. As an added benefit it comes with a thin moulded silicone plastic cover, which I assume is packing, but will serve very nicely as an oil proof membrane as it is sufficiently transparent to see the keys through and very flexible. The mouse has a power saving feature and powers down after a few minutes of being idle, just click to wake it up.
UPDATE April 2015 – I bought another of these for use with my desktop computer, I notice that Maplins now sell it under their own name. With more use I have noticed that if you don’t hit the keys centrally sometimes a key will stick slightly, this doesn’t bother me particularly but a typist would probably find it annoying. I also tried it out with my so called “smart tv” it works OK but the range is not really more than about 2 metres for a reliable connection.
I have been using Alibre for my drawings for some time, the learning curve is pretty steep and on an expertise scale of 1 to 10, I am still firmly at 1 or thereabouts! The latest version for 2013 has been renamed Geomagic Design following the purchase of Geomagic by Alibre’s parent company 3D Systems. There are a number of new features and some tweaks to the interface. There are different versions of the program with Geomagic Design Personal being the entry level that I have. Not all features are available in the Personal version but it is probably the most suitable for the home user and definitely the most affordable. There are plenty of free tutorial videos available and a useful users forum so the new user is well catered for. All you need is a brain slightly less fuzzy than mine…
UPDATE April 2015 – 3D Systems have now decided not to support Design Elements any longer and wanted a whole heap of cash to upgrade to the next higher version. I will keep on with what I have until it no longer functions. Can’t afford lots of pension money for something I don’t use that much!
I would love to build highly detailed, beautifully painted, accurate and stunning models of ships or traction engines.
Why don′t I? Because I am too impatient. I want it finished now! OK perhaps I can manage a few days concentration, maybe a whole month but I read that some model engineers spend 6000 hours or more on a model. Now assuming that you can utilize a full working week, say 40 hours, that works out at 150 weeks, that′s 3 years. That’s full time, what about the engineer who can only manage a few hours a week grabbed after work or at a weekend, we are talking decades to finish a project. My attention span would have long since wilted and been left lying with the swarf on the workshop floor.
I am also really good at starting things but when I get to a difficult bit or a boring bit, putting the project aside until I am in the mood. The trouble is the right mood invariably never returns. This tends to lead to a surfeit of part completed models around the workshop. Now I am determined to fix this problem of my own making but have yet to determine how. Resolve is fine but putting plans into action seems not quite to become a reality.
Step one is to actually get into the workshop, many engineers would be very pleased to have a workshop like mine, so why this reluctance to enter. At the moment there are bits of wood, chipboard and the like stacked here and there, too good to throw away but having no immediate use. I have put up a shelf for my woodturning bits and pieces but in doing so have displaced my selection of saws. This has led to a collection of “stuff” on the bench. Every time I get into the workshop I say “This needs sorting” but haven′t made a start. Perhaps if I solve this problem it will lead to more productive time being spent there.
So a plan emerges, get rid of the wood that I am never likely to use. I just know if I throw it out I will immediately find a use for it but steps must be taken. Clear the bench, this means making a rack or finding some means of storing my hand saws. Trouble there is I have pretty well run out of wall space, having shelves practically everywhere, still I can squeeze something more in I am sure. Perhaps a redevelopment of the storage space under the bench in a similar manner to that under the lathe bench will help?
It’s not much of a plan but a plan nevertheless. Could this be the way forward only time will tell. Watch this space.